Livehelper is a customer
assistance tool for your website that enables site visitors to instantaneously
communicate with your customer service personnel using Text Chat or Voice Over
IP.
Visitors to your website, simply click on the Livehelper
button and are connected to one of your customer service personnel. Your
company representative then provides immediate answers to customer queries by
providing information, pushing web pages, sending graphics or even guiding them
through your website.
Livehelper, thus, provides you with a very superior
customer assistance tool that allows you to provide comprehensive online customer service and support. Your company,
in turn, realizes greater efficiency, by
increasing revenue and reducing support cost by easily integrating this tool
with your existing technology.
The Livehelper tool is provided on an Application Service
Provider (ASP) basis. This means there is no hardware to install and you can
get started instantly. The setup requires minimal technical ability and the
service will be up and running on an average of 30 minutes.
Livehelper 3.0 is available in three packages:
To user Livehelper, your
computer must have one of the following Operating Systems:
·
Windows
9x
·
Windows
ME
·
Windows
NT 4.0
·
Windows
2000
·
Windows
XP
Your computer also needs to
have the following minimum requirements:
·
Internet
Explorer 4.0, Netscape 4.0 or above
·
Soundcard
(for Voice enabled services)
·
28.8
Kbps Internet bandwidth
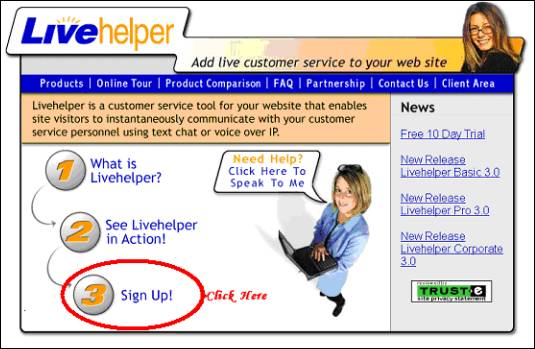
Get Started Immediately! To
download Livehelper, click Sign Up! on the Home Page. All you need to do
is fill the sign-up form, submit it and you are ready to download right away.
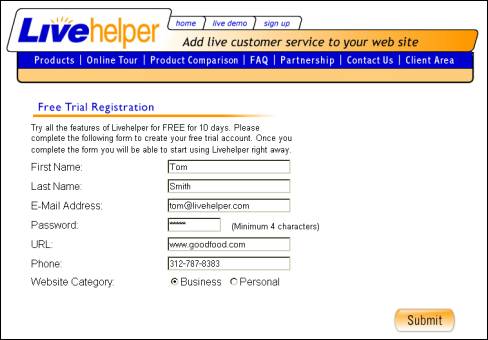
Signup
Form
Fill the form below and submit it.
Ensure that you enter an appropriate E-Mail Address, as all future
communication will be done using this E-mail ID.
Account
Confirmation
Once you click Submit, you
will receive confirmation that your account was created. You will also get your
Company ID and your User Name. You will use these to login into
your account. To log into your account, click Next.
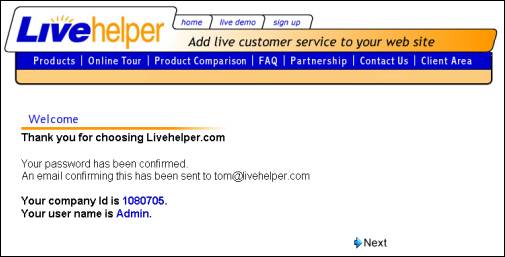
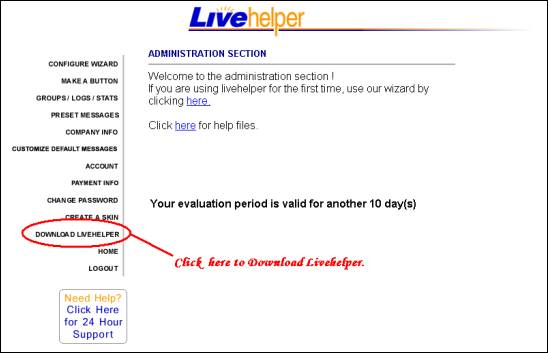
After receiving the confirmation
of your Livehelper account, you have access to login to the admin area. Click
the Download Livehelper link to download the latest version of
Livehelper.
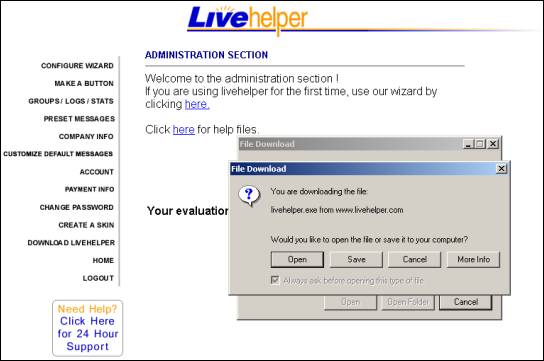
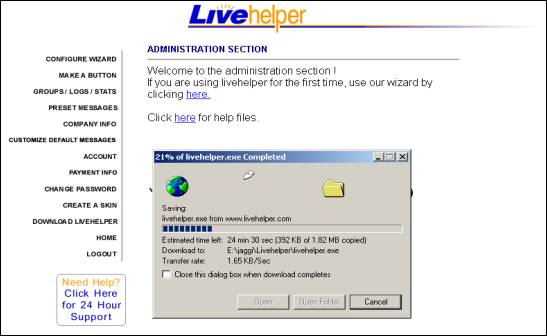
You can either save or open Livehelper.exe.
If you choose Save, the
next step is to save the Livehelper.exe. Select the directory to which you want
to save the same.
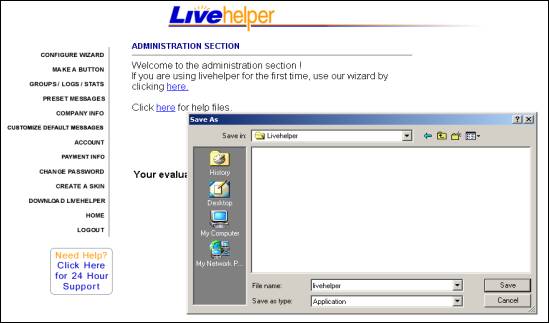
This is the first step in the
downloading process of the .exe file.
Once you have downloaded the
LiveHelper.exe files, double-click on it to start the Setup Wizard. The
following steps will guide you through the installation process.
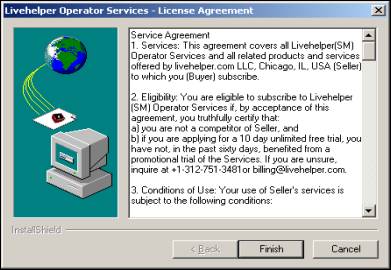
The first window that you see is
the Livehelper
License Agreement. This agreement contains details such as the Service Agreement, the Eligibility Criteria, the Conditions of Use, Warranties, Term of Agreement and so
on. Click Finish
to continue.
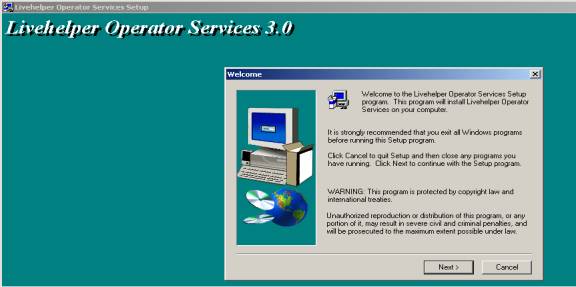
After you click Finish, the
Livehelper Operator Console Setup guides you through the setup process.
The Livehelper Operator Services
Setup program installs the Livehelper Operator Services on your system.
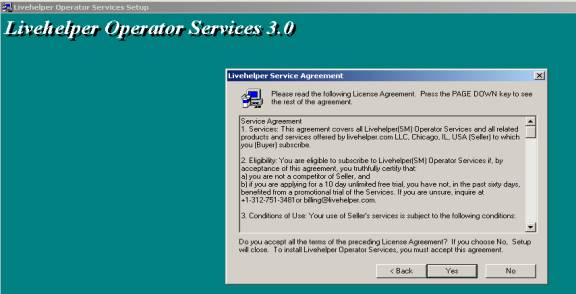
You must accept the License
Agreement to continue with the installation of the program.
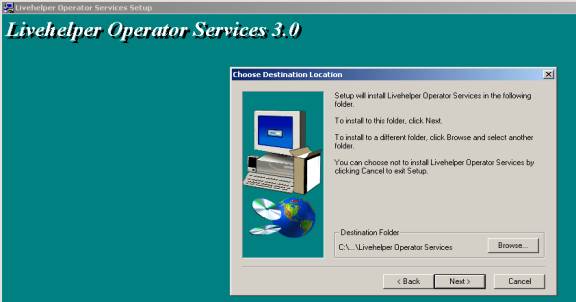
Livehelper is installed in the
folder you specify after you accept the agreement. To install it on a different
folder, click Browse and select the desired Destination folder.
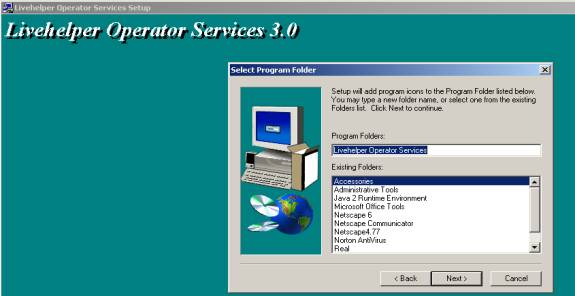
This step enables the Setup Wizard
to add the Program Icon to the Program Folder. You also have the option
to select a new folder name or choose one from the existing folder names.
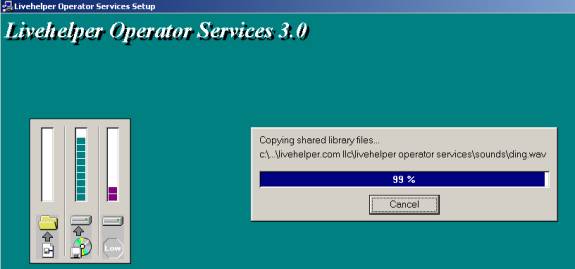
You see the setup progress bar.
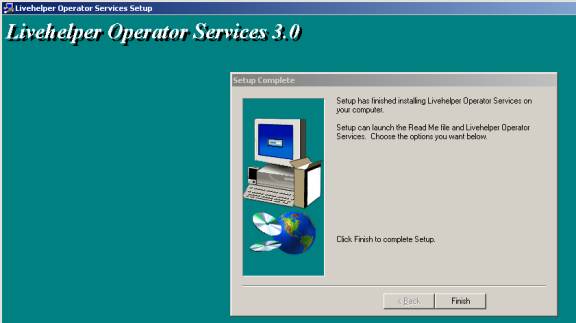
Click Finish to complete
the Setup. This completes the setup
The Basic Package allows you to provide immediate
answers to customers by using our basic chat features. This package contains
essential features such as the Browse List, which allows you to track every
visitor on your website. Other features in this package include Info,
which enable you to save information about your clients; E-mail Signature;
Advanced Call Routing; and Web based Administration among others.
This Package is suited for personal or small websites.
The Basic Package includes
the following features:
- Text
Chat – This feature enables
visitors to your web site to click any of the Live Help Buttons and
instantly join a Text Chat with your operators. They can also
e-mail messages if operators are offline. The text chat comes with eight
different smileys for effective expression. In addition, there is the
option to use varied Fonts, Styles, Colors and Sizes.
- Real Time Traffic Monitoring
– This enables your operators to view visitors on your site, track pages
they navigate, and the total time spent on the site. This provides
operators the opportunity to approach clients based on their needs, view
comprehensive details about the customer, store information about them and
so on.
- Web Based Administration –
This enables Administrators or Operators with administrative rights to log
into the Live Helper Client Area. Administrators have full rights to view
Logs and Statistics of Operators, Create, Delete and Modify Supervisor/Operator
information.
- Status Display on Button – This feature enables you to have
separate images to indicate when operators are offline and online. This is
convenient for site visitors who want to communicate with your customer
service personnel.
- E-mail Signature – This
feature enables you to append a Livehelper button at the end of
your e-mail. This provides the e-mail recipient the option of contacting
you live for a chat by clicking on the button. You can also customize the
button to suit your needs.
Limitation: You must manually
append an E-mail Signature for any replies you make to e-mails received. This
is not automatic.
- Customizable Button
– This feature enables you to create custom buttons that match your
web site. You have the option of selecting the button format best suited
for your needs. This generates an HTML script for the button, which you
need to copy and paste into the source code of your website .For
information about the types for button formats, and how you can use them,
refer .
- Customizable Event Sounds
- This feature alerts
operators about different events using various sounds. The various events
could be entry of a new visitor to the web site, operator logging in,
receiving calls and so on.
- Operator-to-Operator Text Chat
– This feature enables operators belonging to your company to chat with
each other. These operators may be located in different offices or even
remote locations. This is a useful in sharing operators’ workload and
knowledge, to serve your customers and answer their queries.
- Setting and Retrieving info for site visitors
– Operators can use this feature to store information about clients with
whom they have chatted. This information can serve as a reference when the
same client returns for another chat, or even while the chat is in
progress. If an operator has stored any information about a particular
client, an Info icon appears on the Browse List adjacent to the client’s
name. Logged in operators can view the information by clicking on the Info
icon.
- Advanced
Queue - This feature enables operators to
view the customers in the waiting list, their total waiting time, the
group from which they need assistance, the type of chat they have opted
for, and their IP address. This is useful since operators can view
criterion based on which they could invite customers for a chat.
- Support Schedule
– This feature notifies your customers when your online personnel will
next be available outside your company’s normal business hours. Your
customers also have the option to leave an electronic message,
automatically sent to your e-mail address.
Limitation: The
current version does not support Multiple Schedules (operators being able to
schedule their availability for a day i.e. hourly scheduling).
- POP 3
Mails – This feature allows operators to
manage their e-mails from the Operator Console itself. It provides them
information about new mails in their Inbox. Operators can set the time in
minutes, for checking their POP mail server for new mails. They are
notified as and when new mails come in. Operators can also send and
receive e-mails using this feature.
Note: This option is
available to those users who already have LiveHelper 3.0 Pro Package and wish
to migrate to the 4.0 version of LiveHelper.
The Old Professional Package
(Professional Package 3.0) contains all features in the Basic Package in
addition to other advanced features. It contains advanced features such as Chat
Transcripts, which stores all chat transcript logs of interactions between
your operators and customers, thereby allowing you to review them. This package
enables you to guide your customers to the pages they are looking for by simply
opening up a browser window on the client side using the Push feature.
Some of the other features available in this package are Stats, Preset
Text Messages and so on.
The Old Professional Package is
suited for a small or medium size business that requires advanced chat and
monitoring capabilities.
The features of the Professional Plus Package are:
- Image in Chat (Preset HTML) – This
allows you to save pieces of HTML for use in text chats. This feature is
very useful for displaying tables and images for events such as special
offers and sales. This enhances the text chat.
Limitation: The
current version enables operators to send images to customers, but does not
enables sending of images from operator to operator or customer to operator.
- Customizable Chat Window – This feature
enables you to fully customize your chat window skin. You can add your own
logo and background images. For best results, ensure that the images you
add follow the specified dimensions. The dimensions for the two window
sizes are:
|
Image
|
Small Window
|
Big Window
|
|
Background Image
|
295 X 300
|
450 X 350
|
|
Logo
|
295 X 55
|
450 X 55
|
- Chat Transcripts – This feature enables you to
store all communication between your operators and your customers. This
enables you to review the chat sessions, and constantly monitor the
quality of your customer interactions. It also provides you valuable
insight about your visitors. The Administrator can login into the
Livehelper website anytime and review the transcripts.
- Basic Statistics – Administrators can view
advanced statistical information about your customers and operators. The
Administrator can view the statistics regarding the Call Type, Total
Calls, Total Time and Average Time taken
by the operator within the date range specified by the Administrator.
- Preset Messages - The Preset Messages feature
enables operators to preset messages that are sent to customers often.
Preset messages ensure consistency by storing common responses for fast
access. This reduces the effort of having to re-write messages each time,
thus increasing operator efficiency and enhancing performance. Preset
messages can be set globally in the Admin area as well as locally by the
Operator in the Operator Console.
- Push Pages - This feature is useful in helping
customers view the right content in the context of what they are looking
for, and guide them through the web pages. This service is applicable on
the operator side. This is because operators are in the best position to
decide the web pages customers should view on your web site to get answers
for their queries. Operators can use this option to accordingly push the
relevant pages for customers to view.
The Professional Plus Package
contains all features in the Basic Package in addition to other advanced
features. It contains advanced features such as Logs, which stores all
chat transcripts between your operators and customers, thereby allowing you to
review them. This package enables you to guide your customers to the pages they
are looking for by simply opening up a browser window on the client side using
the Push feature. Some of the other features available in this
package are Skins, Stats, Preset Text Messages and so on.
The Professional Plus Package is
suited for a small or medium size business that requires advanced chat and
monitoring capabilities.
The features of the Professional Plus Package are:
- Image
in Chat (Preset HTML) – This
allows you to save pieces of HTML for use in text chats. This feature is
very useful for displaying tables and images for events such as special
offers and sales. This enhances the text chat.
Limitation: The
current version enables operators to send images to customers, but does not enables
sending of images from operator to operator or customer to operator.
- Customizable
Chat Window – This feature enables you
to fully customize your chat window skin. You can add your own logo and
background images. For best results, ensure that the images you add follow
the specified dimensions. The dimensions for the two window sizes are:
|
Image
|
Small Window
|
Big Window
|
|
Background Image
|
295 X 300
|
450 X 350
|
|
Logo
|
295 X 55
|
450 X 55
|
- Chat Transcripts – This feature enables you to
store all communication between your operators and your customers. This
enables you to review the chat sessions, and constantly monitor the
quality of your customer interactions. It also provides you valuable
insight about your visitors. The Administrator can login into the Livehelper
website anytime and review the transcripts.
- Basic Statistics
– Administrators can view advanced statistical information about your
customers and operators. The Administrator can view the statistics
regarding the Call Type, Total Calls, Total Time
and Average Time taken by the operator within the date range
specified
by the Administrator.
- Preset Messages
- The Preset Messages feature enables operators to preset messages
that are sent to customers often. Preset messages ensure consistency by
storing common responses for fast access. This reduces the effort of
having to re-write messages each time, thus increasing operator efficiency
and enhancing performance. Preset messages can be set globally in the
Admin area as well as locally by the Operator in the Operator Console.
- Push
Pages - This feature is useful in
helping customers view the right content in the context of what they are
looking for, and guide them through the web pages. This service is
applicable on the operator side. This is because operators are in the best
position to decide the web pages customers should view on your web site to
get answers for their queries. Operators can use this option to
accordingly push the relevant pages for customers to view.
- Pull and Live Interaction - This option enables
you to create a Live Interaction. This automatically sends timed, context
sensitive chat invitations to your web site visitors. With this option,
you can define which invitation to send and when to send it
- Spell Checker - This option enables you to
configure the spell checker for text chats. Livehelper will conduct a
spell check on the Text Chat for all the items you select in this option.
This is Livehelper’s most
comprehensive package. It includes all features available in the Basic and
Professional Plus Packages. In addition, it contains advanced features
such as Pull, which enable you to proactively invite any website visitor
for a chat and offer assistance. The Remote Feature allows your
operators to virtually access your customer's computer and is especially useful
to help them solve technical queries. This package also provides features such
as Voice Chat and Transfer.
The Corporate Package is ideal for
customers who need to provide advanced customer service to their customers.
The Corporate Package includes the following features:
- Proactively Pull Users –
This feature enables your operators to proactively contact and offer
assistance when they spot users in the Browse List who look like
they need assistance.
Note: The number of
customers that an operator can pull for a chat is unlimited. However,
experience shows that a single operator can handle up to four customers calls
for chatting simultaneously.
- Voice Chat – Livehelper allows you to communicate
using both Text Chat and Voice Chat. If operators prefer,
they can disable one and force users to use the other. However, we find
that most companies prefer to leave the choice of the channel of
communication to their customers. If you would like to provide your
customers with the option of live Voice Chat, you can talk
to your customers through live real time online Voice Chat using our Voice
over IP solution.
- Transfer
Chat – This feature enables operators to transfer a
customer chat to any other operator logged in under the same company ID.
This feature of transfer is available for both Text as well as Voice
Chats.
- Operator-to-Operator Voice Chat
– This feature is similar to the Op-Op Text Chat, except that in this case
it is the voice chat facility used by the operator.
- Advanced
Call Routing - This feature allows for intelligent routing of calls,
based on Groups, Status and the volume of Calls. Calls from customers can
be routed directly to different groups such as Support, and Marketing
directly.
- Remote – This feature allows you to virtually access your
client’s computer from your desktop. Operators can use this feature to
help clients fix technical issues, and demonstrate software.
This section will take you through the Livehelper interface
features.
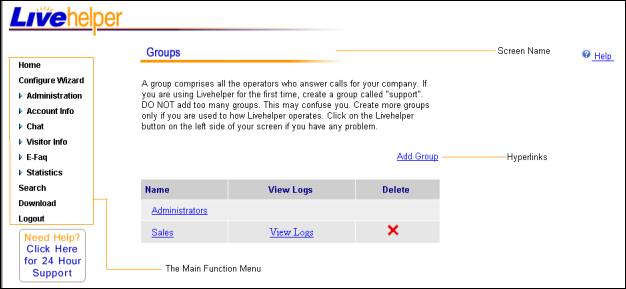
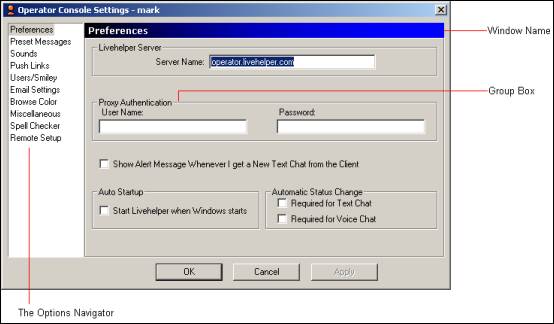
As an Administrator, you have a
very important role in setting up your company’s domain information at the
Livehelper server. You are responsible for configuring the system for your
organization such as adding new users or operators, groups, creating buttons
for use by the operators, setting schedules, creating skins and preset messages
for operators to use, and so on. This section will take you through all the
administrative tasks in the order in which they appear on the main
Administrative menu.
Follow the simple steps to setup
your company domain information into the Livehelper server and reap the
benefits with an optimized performance ratio.
Note 1: Administrators
cannot log into the Operator Console with username Admin and password.
Note 2: Operators
cannot use the Admin password to login to the Operator Console.
This option enables you to
navigate to the main Administration Section from any area in the Administration
section. To go to the main Administration Section, click Home in the
main function menu.
The Configure Wizard function is
extremely useful for first-time users of Livehelper. This enables users to
configure Livehelper for use in their organization in a systematic manner with
the help of a wizard.
From the main function menu, click
Configure Wizard. You see the Configure Wizard screen. This consists of
4 steps – Add User, Download Operator Console, and Create
Button.
The first step in the wizard is Add
User, which enables you to add new users for your organization. These are
the operators who will liaise with your clients to assist them and respond to
their queries. Specify the following details to add a new user.
Note: When you add users
using the Configure Wizard, the users created are automatically assigned
to the default group Support.
- Enter a User Name for the new operator. Ensure
that the name always begins with an alphabet. It should not begin with any
special characters. The name must not contain any spaces and should not be
greater than 30 letters.
- Enter a Password for the new operator. This
must contain a minimum of 4 characters, and a maximum of 30 characters.
- Re-enter the password in the Confirm Password text
box to confirm the new password.
- Enter a Display Name for the operator. This is
the name by which clients identify the operators during a chat session.
- Enter the First Name and Last Name of
the operator.
- Enter the Designation of the operator. For
example, Manager.
- Specify the Email address of the
operator.
- Specify the Mobile Email address of the
operator. If this is specified, operators can receive a message on their
mobile informing them that someone want to chat with them.
- Select the Is the user an Administrator? check
box to indicate that the new user is an administrator. If you do not
select this check box, the new operator cannot perform any administrator
tasks.
- Select the Should the person's text chats be
logged? check box to indicate that the new user’s text chats should be
logged. If you do not select this check box, the new user's chat messages
will not be logged.
- Click Save and add another operator to save
the operator information you specified and add information about another
operator.
- Click Save and proceed to the next step to
save the operator information you specified and move to the next step.
The second step in the wizard is Download
Operator Console, which enables you to download the Operator Console that
will be used by your operators.
- Click the Click here link to download the
livehelper operator software.
- Select the Run this program from its current
position radio button to run the program from the Livehelper server.
You must be connected to the Internet to be able to use this option.
- Select the Save this program to disk radio
button to save the downloaded exe file to your desktop.
- Double-click on livehelper.exe on your desktop
and complete the setup.
- Click Next to proceed to the next step.
This option enables you to create
web buttons for your website. Based on your selection, you are provided an HTML
script. You need to copy and paste this script on your website in the location
where you want the web button to appear.
The first step towards creating a
web button is to select the type of button you want to create. You can select
one of the following formats:
- Select the Default Button with Tracker radio
button to create a web button with a default image and tracker code.
- Select the Invisible Tracker radio button to
create a tracker code without any visible web button.
- Select the Customized Button with Tracker radio
button to create a customized web button with tracker code. This enables
you to select an image of your choice. To customize your button, you must select
parameters as well as select advanced parameters.
- Select the Customized Button without Tracker
radio button to create a customized web button without tracker code. This
also enables you to select an image of your choice. To customize your
button, you must select parameters as well as select advanced
parameters.
- Select the Default EFAQ Button radio button
to create a default EFaq button. When visitors to your web site click
on this button, they can access the EFaq page, which enables them to
search for questions and answers based on keywords.
- Select the Form Sharing Script radio button to
create a Form Sharing Script button. This is useful if visitors have
problems filling out forms on your website. When visitors click on this
button, they enable operators to access their machine and help them to
fill the form.
Note: This button can be
used only when the operator and visitor browsers are synchronized.
- Select the Browse Synchronization Script radio
button to create a browse synchronization script button. This is used to
start a co-browsing session. When users click this button, they can select
the name of the operator with whom they want to conduct a co-browse
session and click the button to start the session. The operator receives a
request to start co-browsing and can accept to start the session or reject
to ignore the request. Alternatively, if an operator is on a voice chat
with a visitor and wishes to direct the user on how to fill a form or
other such action, the operator could direct the user to navigate to the
particular URL and click the co-browse button.
The second step towards creating a
web button is to select the parameters to be used for the button. To select the
parameters, do the following:
- Select the Group for the button from the list
of groups you created. For example, Sales, Technical Support and so on.
When your clients click this web button, only those logged in operators
belonging to the selected group will receive calls. This option is
disabled if you select either the Invisible Tracker, or Form
Sharing Script radio buttons.
- In the Enter the page name on which you wish to
place the tracker text box, specify the page title on which you would
like to place the web button. For example, Home, Help, Sales and so on.
- Click Next to save the information and
proceed.
Note: You can create
only one web button at a time. If you require another web button follow the
steps as described above.
Use this option to add extra
parameters for your web button. You will use this option if you selected either
the Customized button with Tracker or the Customized button without
Tracker radio buttons. Specify the following details to add advanced
parameters:
- Select the I would like to have plain text radio
button to add a text message to the button in the space provided.
- Select the I would like to choose images radio
button to add the path for images you would like to use. Note that you
need to specify details of an online image as well as an offline
image.
This is the third step in creating
a button. This option provides you the HTML code that you need to select, copy
and paste into your website. Note that you must paste it in the location where
you want to add the web button.
- Click Select and copy the entire web button
code, paste it onto your web page source code where you want the web
button to appear.
- Click Home to return to the main
Administration section.
The Administration menu enables
you to perform initial administrative tasks such as registering your company
information with Livehelper, creating groups and users for your company,
creating buttons that your clients can click on to get in touch with your
operators, as well as specifying schedules for operators in your company.
Click Administration from
the main functions menu to navigate to the Administration function. It contains
the following options – Change Password, Company Info, Groups/Logs,
Search Logs, Create Button, and Schedule.
This section will take you through
each of the Administration options and how to perform each task.
As an Administrator, you are
advised to change your password frequently. Use this option to change your
password.
- Click Administration.
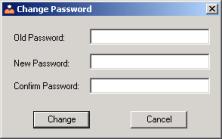
- Select Change Password. You see the Change
Password option. To change your password, specify the following
information:
- In the Enter Current Password text box, enter
the password you are using currently.
- In the Enter New Password text box, enter the
new password you want to use.
- In the Confirm Password text box, enter the
new password again to confirm it.
Note: Ensure that
your password has a minimum of 4 characters and a maximum of 25 characters.
Your password is masked by asterisks (*********) for your security.
This option enables you to specify
information about your company. Alternatively, you can also use it to make
changes to information that you had previously specified.
- Click Administration.
- Select Company Info. You see the Company
Information option. This option contains two tabs - Company Information,
and Live Directory. Select the
appropriate tab to add company information or LiveDirectory listing
information
The COMPANY Information Tab
The information in this tab is the
same that you specified at the time of signing up for Livehelper. You can use
this tab to edit that information. To complete the Company Information
tab, specify the following details:
Note: All the fields
in this tab are mandatory. You cannot leave them blank.
- In the First Name text box, specify your first
name.
- In the Last Name text box, specify your
last name.
- In the Personal E-Mail Address text box,
specify your personal e-mail address.
- Specify the Title with which you would
like to be addressed. For example, Dr., Mr., Ms., Mrs., Prof. and so on.
- Specify the name of your Company.
Note: This name is
displayed when you select the Keyword - Company Name while adding
customized default messages.
- Select the Department to which you belong,
from the drop-down list. For example, Accounting. If you select Other,
please specify the details of the department in the text box provided.
- Enter a Brief description of what your company
does in the text box.
- Select the Time Zone applicable to your
company from the drop-down list. Move your mouse over the Show current
GMT link to view the Current GMT time.
- In the E-Mail address to be sent to if no
operators are online? text box, specify the e-mail address you would
like to use for correspondence in the event that no operators or agents
are online.
- Select the appropriate radio button to indicate if
you want the group name to be visible in the chat window. To do this, from
the Show group name in chat window option, select Yes or No
as appropriate.
- Select the Chat window size to indicate the
type of chat window you prefer. Select Small if you want a small
window or select Big if you want a big window. You can see the
sizes of the chat windows displayed based on your selection.
- Specify the website URL for your company.
- Specify the Address for your company. This
includes information about the City, State, Country and
Zip Code.
- Specify the contact Phone number of the
company. Ensure that you specify a number that contains a minimum of 7
characters and a maximum of 25 characters.
- Specify the contact Fax number of the company.
- Select the appropriate radio button to choose the Website
Category to which your website belongs. Select the Business
radio button if your website is a business website. Alternatively, select
the Personal radio button if it is a personal website.
- Select the appropriate radio button to enable or
disable email of chat transcripts. Select Yes to enable the email
or select No to disable the email.
- Select the
appropriate radio button to show or hide the Operator Name in the chat
window. Select Yes to show the operator name or select No to
hide the operator name.
- Click Update to register the changes.
The Live Directory Tab
The Livehelper website contains a
list of all companies that use Livehelper. This is known as the LiveDirectory.
As an administrator, you can contact any of the clients listed there for a
reference. This tab provides you the option to choose whether you want your
company to be a part of the LiveDirectory listings.
- Select the appropriate radio button from the Do you want LiveDirectory listings ?
to make your choice. Select Yes
to be listed in LiveDirectory or select No if you do
not require the same.
- Select the category for the listings from the Please select your category drop-down
list.
- Select the sub category associated with the category
you selected from the Please select
your Sub Category drop-down list.
- Click Update to register the changes.
The Groups/Logs menu provides
you all the details that you require about the various groups, the users
belonging to the groups, user logs, and so on. Use
this function to add new groups, edit details of existing groups, add new users, create
pre-defined HTMLs, view and edit user details,
and view and edit pre-defined HTMLs for
your company. In addition you can customize access for users, view statistics
and delete users.
View
Group Logs
- Click Administration.
- Select Groups/Logs. You see the Groups
screen. This provides you a summary of information about all the groups
for your company.
- Click View Logs to view logs for the selected
group. The log for the selected group is displayed. In the log window:
- Click the Year hyperlink to view the logs
for the selected year.
- Click the Month hyperlink to select the
month for which you want to view the log.
- Click the Date hyperlink from the calendar
to select the date for which you want to view logs.
- Click on a Chat Description to view the
transcript for the selected chat.
- Click the Print icon to print the chat
transcript.
- Click the Delete icon to delete the selected
chat.
- Click the Chat History icon to view the
details of the chat history.
- Click Administration.
- Select Groups/Logs. You see the Groups screen.
Select the group from the Name in the Groups screen. You see
the User Group screen. This provides you a summary of information
about all the users for the selected group.
- Click View Logs to view logs for the selected
user. The log for the selected user is displayed. In the log window:
- Click the Year hyperlink to view the logs
for the selected year.
- Click the Month hyperlink to select the
month for which you want to view the log.
- Click the Date hyperlink from the calendar
to select the date for which you want to view logs.
- Click on a Chat Description to view the
transcript for the selected chat.
- Click the Print icon to print the chat
transcript.
- Click the Delete icon to delete the selected
chat.
- Click the Chat History icon to view the
details of the chat history.
Add Group
This option enables you to add new
groups for your company. For example, you can add groups for Sales, Support or
Marketing.
- To add a new group, click Add Group. You see
the User Group screen. Specify the following details to add a new
group:
- In the Group Name text box, specify a name for
the group you want to create. For example, Sales. This is a mandatory
field.
- In the Group Email text box, specify the
e-mail address associated with the group you are creating. For example,
Sales@livehelper.com. This is a mandatory field.
- In the Group Phone1 and Group Phone2 text
boxes, specify the contact phone numbers associated with the group. These
are displayed in the chat window. Ensure that you specify telephone
numbers that contain a minimum of 7 characters and a maximum of 30
characters.
- In the Description text boxes, write notes
about the phone numbers.
- Select the If no operators are online in this
Group, would you like the calls to be placed in the queue? check box
to place calls in a queue while operators are off-line. If you do not
select this check box, users will see an e-mail form to get in touch with
your company.
Once you have added groups for
your company, you might need to edit the group information. This option enables
you to make changes to group information you have specified previously.
- To make changes to details of an existing group,
click the Name in the Groups screen. You see the Group
Detail screen.
- Click Edit Group to make changes to the
details as necessary.
Note: You cannot change the
name of the group.
- In the Group Email text box, specify the
e-mail address associated with the group you are modifying. For example,
Sales@livehelper.com. This is a mandatory field.
- In the Group Phone1 and Group Phone2 text
boxes, specify the contact phone numbers associated with the group. These
are displayed in the chat window. Ensure that you specify telephone
numbers that contain a minimum of 7 characters and a maximum of 30
characters.
- In the Description text boxes, write notes
about the phone numbers.
- Select the If no operators are online in this
Group, would you like the calls to be placed in the queue? check box
to place calls in a queue while operators are off-line. If you do not
select this check box, visitors will see an e-mail form that they can use
to get in touch with your company.
Delete groups
Use this option to delete groups
that you no longer need for your organization.
- Click Administration.
- Select Groups/Logs.
- Click the Delete icon adjacent to a group name
to delete the group.
Note: You cannot delete a
group that has operators associated with it.
All operators must belong to a
group. Hence you must create groups before you add operators. This option
enables you to add new operators to groups you have created.
- To add a new operator to a group, select the group
from the Name in the Groups screen. You see the User
Group screen. Click Add User to add a new operator to the
selected group. Specify the following details:
- Enter a User Name for the new operator. Ensure
that the name always begins with an alphabet. It should not begin with any
special characters. The name must not contain any spaces and should not be
greater than 30 letters.
- Enter a Password for the new operator. This
must contain a minimum of 4 characters, and a maximum of 30 characters.
- Re-enter the password in the Confirm Password text
box to confirm the new password.
- Enter a Display Name for the operator. This is
the name that is used by operators to identify themselves to clients
during a chat session.
- Enter the First Name and Last Name of
the operator.
- Enter the Designation of the operator. For
example, Manager.
- Specify the Email address of the
operator.
- Specify the Mobile Email address of the
operator. If this is specified, operators can receive a message on their
mobile informing them that someone want to chat with them.
- Select the Is the user an Administrator? check
box to indicate that the new user is an administrator. If you do not
select this check box, the new operator cannot perform any administrator
tasks.
- Select the Should the person's text chats be
logged? check box to indicate that the new user’s text chats should be
logged. If you do not select this check box, the new user's chat messages
will not be logged.
Edit User Details
Once you have created operators
for a group, you might want to modify the information. This option enables you
to edit the operator details.
- Select the group from the Name in the Groups
screen. You see the User Group screen. Click Name to select
the name of the operator whose details you want to modify.
Note: You cannot edit the User
Name.
- Enter a Password for the operator. This must
contain a minimum of 4 characters, and a maximum of 30 characters.
- Re-enter the password in the Confirm Password text
box to confirm the new password.
- Enter a Display Name for the operator. This is
the name that is used by operators to identify themselves to clients
during a chat session.
- Enter the First Name and Last Name of
the operator.
- Enter the Designation of the operator. For
example, Manager.
- Specify the Email address of the
operator.
- Specify the Mobile Email address of the
operator. If this is specified, operators can receive a message on their
mobile informing them that someone want to chat with them.
- Select the Is the user an Administrator? check
box to indicate that the operator can also login as an administrator. If
you do not select this check box, the new operator cannot perform any
administrator tasks.
- Select the Should the person's text chats be
logged? check box to indicate that the user’s text chats should be
logged. If you do not select this check box, the user's chat messages will
not be logged.
On occasion, you may want to
delete existing users from your system. This option enables you to delete
existing users.
- Select the group from the Name in the Groups
screen. You see the User Group screen.
- Click Delete adjacent to the name to delete
the selected user.
This option enables you to send
images in HTML format. It also enables you to see a preview of your HTML
message.
- To add a new pre-defined HTML, select the group from
the Name in the Groups screen. You see the User Group
screen. Click Predefined HTML to create a new pre-defined HTML for
the selected group. You see the Predefined HTML Script option.
Specify the following details:
- Specify the Name of the new HTML file that you
are creating.
- Enter the Script for the HTML message.
- Click Preview to see a preview of the message
you scripted. The preview opens in a new window.
- Click Add to add the HTML you created.
Note: To add images
with the scripts, you must include the relevant HTML tags with the script. You
can also copy and paste existing HTML scripts.
This option enables you to make
changes to pre-defined HTMLs.
- To edit a pre-defined HTML, select the group from the
Name in the Groups screen. You see the User Group
screen. Click Predefined HTML. You see the Predefined
HTML Script option. Select the HTML Name from the list. You see
the View Predefined HTML option.
- You can view the Name of the HTML file that
you are editing.
- Make the necessary changes to the Script.
- Click Preview to see a preview of the message
you scripted. The preview opens in a new window.
- Click Submit to update the HTML you changed.
Use this option to customize
access for users in your organization.
- Click Administration.
- Select Groups/Logs.
- Select the name of the group associated with the
user, for whom you want to customize the access.
- Click the Customize hyperlink adjacent to the
name of the user whose access you wish to customize. You see the Customize
Access screen.
- You see details such as the Feature Name.
Select the Disable check box to disallow the selected user from
accessing the selected feature.
- Click Submit to implement the changes
Use this option to search for
information from chat transcripts. You can search on the basis of a date range
and operator-wise or group-wise.
- Click Administration.
- Select Search Logs. You see the Search Logs
screen.
- Specify the word you want to search for in Enter
the keyword. This is the word you want to search for in the chat
transcripts.
- In the Search By Date group box, specify the Start
Date and the End Date to define the date range for which you
want to search the transcripts. Note that the End Date must be
greater than the Start Date.
- From the Select the Search Category group box,
select the appropriate radio button to narrow the search based on
transcripts belonging to all operators, particular operators or groups.
- Select the All Operators radio button to
search for the word from the transcripts of all operators.
- Select the Particular Operators radio button
to search for the word from the transcripts of a particular operator. You
see a drop-down list from which you can select the name of the operator
whose transcripts you want to search,
- Select the Groups radio button to search for
the word from the transcripts of a particular group. You see a drop-down
list from which you can select the name of the group whose transcripts
you want to search.
- Click Get Statistics to view the statistics or
the search results. You see the Get Statistics screen.
Use this option to view the statistics or search results of
the Search Logs.
- Click Administration. Select Search Logs.
Specify the search criteria and click Get Statistics. You see the
Get Statistics screen.
- The number of search results is displayed. The
details you can see are the Sl. No., the Date, and the Search
Results.
- Click on any of the Search Results to view the
details of the selected chat.
This option enables you to create
web buttons for your website. Based on your selection, you are provided an HTML
script. You need to copy and paste this script on your website in the location
where you want the web button to appear.
The first step towards creating a
web button is to select the type of button you want to create. You can select
one of the following formats:
- Select the Default Button radio button to
create a web button with a default image and tracker code.
- Select the Invisible radio button to create a
tracker code without any visible web button.
- Select the Custom button radio button to
create a customized web button. This also enables you to select an image
of your choice. To customize your button, you must select parameters
as well as select advanced parameters.
- Select the Text Link radio button to
create a text link. When visitors to your website click this text link,
they can initiate a chat with operators who belong to the group you selected.
- Select the Default EFAQ Button radio button
to create a default EFaq button. When visitors to your web site click
on this button, they can access the EFaq page, which enables them to
search for questions and answers based on keywords.
- Select the Form Sharing Script radio button to
create a Form Sharing Script button. This is useful if visitors have
problems filling out forms on your website. When visitors click on this
button, they enable operators to access their machine and help them to
fill the form.
- Select the Browse Synchronization Script radio
button to create a browse synchronization script button. This is useful
when visitors to your web site have trouble in navigating or even
conducting certain transactions. When visitors to your web site click this
button, your operators can access their machines and browse to help them
conduct their business.
- The second step towards creating a web button is to
specify the Browse List Details to be used for the button.
- In the Would you like this page to be shown on
your browse list, select the Yes radio button to view the page
on your browse list or select No if you do not want to view it on
your browse list.
- In the Enter the page name for this page text
box, specify the page title on which you would like to place the web
button. For example, Home, Help, Sales and so on.
- Select the Group for the button from the
list of groups you created. For example, Sales, Technical Support and so
on. When your clients click this web button, only those logged in
operators belonging to the selected group will receive calls. This option
is disabled if you select either the Invisible, and Form
Sharing Script radio buttons.
- Click Install Code to view the HTML code that
is generated. You now need to select, copy and paste into your website.
Note that you must paste it in the location where you want to add the web
button.
- Select, copy the entire web button code, and paste it
onto your web page source code where you want the web button to appear.
Note: You can create only
one web button at a time. If you require another web button follow the steps as
described above.
Use this option to set schedules
for groups in your organization. Your customers will find this useful since
they will be informed about operator availability through this schedule. To set
a schedule, follow the steps described:
- Select the Time Zone applicable to your
organization from the drop-down list.
- Move your mouse over Show current Greenwich Mean
Time to view the current GMT.
- Select the check box adjacent to the weekday to set
the schedule for the day.
- Select the from Hours and Minutes, from
the drop-down list, to set the time from which operators will be
available.
- Similarly, select the to Hours and Minutes,
from the drop-down list, to set the time till which operators
will be available.
- Click Submit to save and proceed.
The Account Info function
is another important function that you as an Administrator have to perform.
This enables you to register information about your company with the Livehelper
server and choose the kind of Livehelper package best suited to your company’s
requirements.
Click Account Info from the
main functions menu to navigate to the Account Info function. This
contains three options – Package, Payment, and Billing.
This section will take you through the Account Info options and how you
can use them.
The Package option enables
you to register the number of operator seats, and the package you want to
purchase. To register your account, specify the following information:
- In Number of Operator Seats, select the number
of operator seats you want to purchase from the drop-down list. For
example 1, 2, 3, 5, 10 .... 15.
- In Select a Package, select the
relevant radio button to choose the package you want to purchase. You can
choose from Basic, Pro Plus, and Corporate.
- Click Next to continue. Based on the package
you selected in the previous step, you see the list of Additional
Features. If you selected the Basic package, you see the list
of items for the Pro Plus, and Corporate packages. If you selected the Pro
Plus package, you see the list of items for the Corporate
package. If you selected the Corporate package, you see a list of
other Add On features.
- You now see Select Add On Features such as Co-Browse,
eFAQ, Adv Sales Tool, Form Sharing, Remote
Illustration, Statistics, and Customer Groups And User List.
This enables you to customize the solution to suit your business
requirements. This contains a list of all items available for the various
packages and the cost per item.
- Select the relevant radio button to select or
de-select all features listed. To select all the features listed in the
four packages, select the Select all features radio button.
Alternatively, to clear the selection you made, select the De-select
all features radio button. You can also select individual items
from the various lists by selecting the check box adjacent to the item you
want to purchase.
- Click Submit to continue. You see the Confirmation
step. This lists the summary of the Package Type, Number of
Operators, and the Grand Total of the amount payable.
Click Confirm Order to register your order. Alternatively, to
cancel your order at this stage, click Cancel Order.
- Click Account Info. Select Payment. You
see the Credit Card Information screen. Specify the following information
to register your credit card details:
- Select the Card Type you want to use from
the drop-down list. You can choose from Visa, Master Card, American
Express, and Discover.
- Specify your 16 digit Card Number.
- Select the Expiry Month of your card from
the drop-down list.
- Select the Expiry Year of your card from the
drop-down list.
- Enter your Name as it appears on your credit
card.
- Specify your Address details including the City,
State or Province, Country, and Zip Code.
- Click Change Card to clear the card
information you specified. You can now specify new information.
- Click I Accept to submit your credit card
information.
The Chat function enables
you to configure the look and feel of the chat window to suit those of your
company’s web site. These chat windows are the ones that visitors to your web
site will use to interact with your company.
Select Chat from the main
functions menu to navigate to the Chat function. It contains the
following options – Create Skins, Default Message, Preset
Message, Routing Config, and Survey.
This section will take you through
each of the Chat options and how you can use them.
This option enables you to
customize skins for chat windows that your visitors will view.
- Select Chat. Select Create Skins. You
see the Create Skin option. To create a skin, you need to complete the
following steps.
- In the Select the window size step, the size
of the current chat window is displayed. If you prefer the other size,
click the click here hyperlink. For example, if the window size is Small,
when you click on the provided hyperlink, the chat window size will change
to Big and vice versa.
- In the Select the set of images you want to
upload step, you can select the images you want to upload as part of
the skin.
- Select the Select Background and Logo images
check box to change the background and logo images to be displayed in the
chat window.
- Select the Select Text Chat and Voice Chat
images check box to change the text chat and voice chat images to be
displayed in the chat window.
- Select the Select Send Chat and End Chat images
check box to change the send chat and end chat images to be displayed in
the chat window.
- Select the Bar Image check box to change the
bar image on the chat window.
- Select the Submit Button image to change the
image of the submit button.
- Click on the Revert back to default skin
hyperlink to revert back to the default skins and proceed.
- Click Next to save the images and proceed.
- Use the Upload background image and Upload
your Company Logo steps to upload background images and your company
logo for the skin. These options are available only if you selected the Select
Background and Logo images check box in the Select the set of
images you want to upload option.
- To upload the background image, click Browse
in that step to search for and select the image you want to use. Click Preview
to see a preview of the image in a new window.
- To see the size of the default background image,
click the click here hyperlink.
- To upload the company logo image, click Browse
in that step to search for and select the image you want to use. Click Preview
to see a preview of the image in a new window.
- To see the size of the default logo, click the click
here hyperlink.
- Click the Save all images and Preview
hyperlink to save the images you uploaded and preview them.
Note: You can use images in
the following formats only: gif, pgif, jpg, jpeg and pjpeg.
- Use the Upload your Text Chat Image and
Upload your Voice Chat Image steps to upload images representative of
text and voice chats. When users click on these images in a chat window,
they open either a text chat or a voice chat. These options are available
only if you selected the Select Text Chat and Voice Chat images
check box in the Select the set of images you want to upload option.
- In the Upload your Text Chat Image step,
click Browse to select the image you want to upload. When users
click on this image, a text chat is initiated.
- In the Upload your Voice Chat Image step,
click Browse to select the image you want to upload. When users
click on this image a voice chat is initiated.
- Click the Save all images and Preview
hyperlink to save the images you uploaded and preview them.
- Use the Upload your Send Chat Image and Upload
your End Chat Image steps to select images that will are used to send
a chat message or end a chat. These options are available only if you
selected the Select Send Chat and End Chat images check box in the Select
the set of images you want to upload option.
- In the Upload your Send Chat Image step,
click Browse to select the image you want to upload. When users
click on this image, the chat message is sent.
- In the Upload your End Chat Image step,
click Browse to select the image you want to upload. When users
click on this image, the chat is terminated.
- Click the Save all images and Preview hyperlink
to save the images you uploaded and preview them.
This option enables you to
customize the messages that are displayed to your customers. Operators cannot
delete default messages set by administrators. To customize the messages,
specify the following details:
- If no operators are logged in, select the relevant
radio button from the Do you want to receive emails option. Select
the Yes radio button to receive emails. Alternatively, select the No
radio button if you do not want to receive emails.
- If you do not want emails, enter the message that
should be displayed when no operators are online in the If you do not
want emails then please type the customized message to be displayed
text box.
Note: That message cannot
contain more that 200 characters.
- Click the Company Name hyperlink from Insert
Keywords to add your company name. This will select your company name
automatically and display it.
- Select the Message text color from the
drop-down list to choose the color that should be used to display the
message text.
- Click Preview to see a preview of your
entries in a new window.
- In the Please enter the message to be displayed
when operators are busy text box, enter the message to be displayed
when operators are busy.
Note: This message cannot
contain more than 200 characters.
- Click the Company Name hyperlink from Insert
Keywords to add your company name. This will select your company name
automatically and display it.
- Click the Client Name hyperlink from Insert
Keywords to add your client's name. It will automatically pick up the
clients name from the chat name entry screen and display it.
- Select the Message text color from the
drop-down list to choose the color that should be used to display the
message text.
- Click Preview to see a preview of your
entries in a new window.
- In the Please enter the Thank You message text
box, enter the thank you message you want to display when the chat is
over.
Note: This message cannot
contain more than 125 characters.
- Click the Company Name hyperlink from Insert
Keywords to add your company name. This will select your company name
automatically and display it.
- Click the Operator Name hyperlink from Insert
Keywords to add your operator name. It will automatically display the
name of the operator who is handling the chat.
- Click the Client Name hyperlink from Insert
Keywords to add your client's name. It will automatically pick up the
clients name from the chat name entry screen and display it.
- Select the Message text color from the
drop-down list to choose the color that should be used to display the
message text.
- Click Preview to see a preview of your
entries in a new window.
- In the Please enter Welcome message text box,
enter the message you want to display when users log into the chat.
Note: This message cannot contain
more that 200 characters.
- Click the Company Name hyperlink from Insert
Keywords to add your company name. This will select your company name
automatically and display it.
- Click the Operator Name hyperlink from Insert
Keywords to add your operator name. It will automatically display the
name of the operator who is handling the chat.
- Click the Client Name hyperlink from Insert
Keywords to add your client's name. It will automatically pick up the
clients name from the chat name entry screen and display it.
- Click Preview to see a preview of your
entries in a new window.
- Click Submit to save the information and
proceed.
This option enables you to add or
modify messages that can be used by groups of operators. All operators can view
these preset messages. However, operators cannot delete preset messages set by
administrators.
- Click Chat.
- Select Preset Message. You see the Preset
Messages option.
To add a message group, click Add
Message Group. You see the Message Groups option.
Specify the Group Name and
click Submit to save and register the new group you added.
- In the Message Groups option, you see the Group
Name.
- Click on a Group Name to select the group and
add or modify existing messages. You see the Messages option.
- Click Add Message to add a new message. You
see the Add New Messages option.
- Enter the new message in the Message text box.
- Click on the Company Name hyperlink from Insert
Keywords to add your company name to the message .
- Click on the Operator Name hyperlink
from Insert Keywords to add your operator name to the message.
- Click on the Client Name hyperlink from Insert
Keywords to add the client name to the message.
- Click Submit to save and proceed.
- In the Preset Messages option, select
the Group Name for which you want to edit the message. You see the Messages
option.
- Click on the Message Name to edit the message.
Make the required changes and click Submit.
The Routing Configuration option
enables you to route calls to operators according to the option best suited for
your business. You can use this option only when you have more than one
operator taking calls.
The various options that you can
use to route calls to operators are:
- Click Chat. Select Routing Config.
- Select a Group to which the operator belongs
from the drop-down list.
- From Select Operator Admin Choice, select
the criteria used for the operators to accept calls.
- Select the Route Calls by Round robin radio
button to route an equal number of calls to all operators.
- Select the Route Calls to Operator with least
number of chats radio button to route calls to the operator with no
calls or the least number of calls.
- Select the Distribute Calls by Ranking the
Operators radio button to route calls to operators based on their
ranking. This option enables you to rank each operator and the operator
who is ranked the highest receives the most number of calls. If you select
this radio button, you see the Rank the operators from 1 to 10 (1 being
the least) group box. You see Sl. No., the Operator Name,
and the Rating drop-down list. For each operator, select the rating
applicable.
- Select the Distribute Calls by Percentage
radio button to route a fixed percentage of the total number of calls that
the operators receive. You can set a different percentage for each
operator. If you select this radio button, you see Sl. No., the Operator
Name, and the Percentage Rating drop-down list. For each
operator, select the percentage rating applicable. For example, you
specify the Percentage Rating for Jane to be 10% and for Amelia to be 20%.
The total number of calls received is 50, then Jane will receive 5 calls
and Amelia will receive 10 calls.
- Click Submit to proceed.
Note: If you do not select any criteria for operators
to accept calls, the Route Calls by Round Robin method will be used by
default.
The Survey option enables you to
get feedback from visitors who use e-FAQ
and the Chat features. Use this option to get feedback on the usefulness
of your web site, efficiency of your operators and so on. You can use this
feedback to improve the experience of users to your web site.
Use the Survey option to
create and modify survey forms for your organization. These are forms that you
will ask your clients to fill so that you can receive feedback for future
reference.
Click Chat. Select Survey
from the menu. You see the survey screen. Use this screen to do the following:
- Select a value from the Number of records to be
displayed per page drop-down list to specify the number of surveys you
want to view in a single page.
- You can decide if you want your clients to view the
current survey in the same window or in a new window. To do this, for the Show
the current survey in option, select the Same Window or the New
Window radio button based on your choice.
- You can see the summary of all the surveys in a list.
The details you can view are:
- Sl. No. – this is the order in which the
surveys were created.
- Name – this is the name you specified for
the survey. Click this to view details of the selected survey. You see
the Survey Details screen.
- Created on – this is the date on which the
survey was created.
- Current Survey – select this radio button
adjacent to a survey to mark the selected survey as the current survey
visible to visitors. Click Set Current Survey/Survey Window to
update this survey as the current survey that will be visible to your
website visitors.
- Feedback – click this icon to view feedback
received for the selected survey. You see the Feedback screen, which lists
the details of the number of answers for each option and each question.
It also lists the total number of feedbacks. Click the Click here hyperlink
to view the details of the answers.
- Delete – click this icon adjacent to a
survey to delete the selected survey.
- Click Add a New Survey to add a new survey.
You see the Add Survey screen.
- View Set Current Survey Details Click on this
link to view the details of the survey to be displayed to the visitor.
Note: You can have a
maximum of 5 surveys for your company.
- Navigate to the Survey screen. Click Add Survey
to add a new survey for your organization. You see the Add Survey screen.
- Select the Make this as the current survey
check box to set the survey you are creating as the current survey. This
is the survey that is displayed to your visitors.
- Specify the Survey Name. This is the name
which is displayed to your clients and which identifies the survey.
- Enter a Question. You can add a maximum of 20
questions in a survey.
- Select a Type for the question from the
drop-down list. This is the type of option you want to provide the clients
as an answer. You can choose from:
- Yes/No – this enables your clients to choose an
answer from a set of Yes and No radio buttons.
- True/False – this enables your clients to choose an
answer from a set of True and False radio buttons.
- Drop Down Menu – this enables your clients to
select an option from a drop-down list. If you select this type, you also
need to add the option choices. To do this, enter the option you want in
the Enter Option text box. Click Add to add the option to
the Option List. To modify an option, select the option in the Option
List and click Edit. Make the requisite changes and click Add.
- Radio Button – this enables your clients to select
one option from a set of radio buttons. If you select this type, you also
need to add the option choices. To do this, enter the option you want in
the Enter Option text box. Click Add to add the option to
the Option List. To modify an option, select the option in the Option
List and click Edit. Make the requisite changes and click Add.
- Check Box – this enables your clients to select an
option from a set of check boxes. If you select this type, you also need
to add the option choices. To do this, enter the option you want in the Enter
Option text box. Click Add to add the option to the Option
List. To modify an option, select the option in the Option List and
click Edit. Make the requisite changes and click Add.
- Multi Line Text Box – this enables your clients to
enter text in a multi line text box. If you select this type, you must
also specify the Length of the text box, the number of Lines,
the Max Length, and the Initial Value of the text box that
the client will see.
- Click Next Question to save this question and
create a new question for the survey.
- Click Finish to complete and save the survey.
Use this option to make changes to
details of existing surveys.
- Navigate to the Survey screen. Click Name to select the survey to which
you want to make changes. You see the Survey Details screen, which
displays the following details:
- Sl. No.
– this is the order of the questions in the survey.
- Question
– this is the question as it appears in the survey.
- Question
Enability – select this check box and click Update Question Validity to add the question to the survey.
Alternatively, if there is a question that you want to disable, clear
this check box and click Update
Question Validity to remove the question from the survey. Use this
option when you temporarily do not want a question to be displayed.
- Delete – Click this icon to delete the selected
question. You can only delete those questions that are disabled. This
deletes the question from the survey permanently.
- Select the Make
this as the current survey check box to set the survey you are
creating as the current survey. This is the survey that is displayed to
your visitors.
- Specify the Survey
Name. This is the name which is displayed to your clients and which
identifies the survey.
- Enter a Question.
You can add a maximum of 20 questions in a survey.
- Select a Type
for the question from the drop-down list. This is the type of option you
want to provide the clients as an answer. You can choose from:
- Yes/No – this enables your clients to choose an
answer from a set of Yes and No radio buttons.
- True/False – this enables your clients to choose an
answer from a set of True and False radio buttons.
- Drop Down Menu – this enables your clients to
select an option from a drop-down list. If you select this type, you also
need to add the option choices. To do this, enter the option you want in
the Enter Option text box.
Click Add to add the option to
the Option List. To modify an
option, select the option in the Option
List and click Edit. Make
the requisite changes and click Add.
- Radio Button – this enables your clients to select
one option from a set of radio buttons. If you select this type, you also
need to add the option choices. To do this, enter the option you want in
the Enter Option text box.
Click Add to add the option to
the Option List. To modify an
option, select the option in the Option
List and click Edit. Make
the requisite changes and click Add.
- Check Box – this enables your clients to select an
option from a set of check boxes. If you select this type, you also need to
add the option choices. To do this, enter the option you want in the Enter Option text box. Click Add to add the option to the Option List. To modify an option,
select the option in the Option
List and click Edit. Make
the requisite changes and click Add.
- Multi Line Text Box – this enables your clients to
enter text in a multi line text box. If you select this type, you must
also specify the Length of the
text box, the number of Lines,
the Max Length, and the Initial Value of the text box
that the client will see.
- Click Next
Question to save this question and create a new question for the
survey.
- Click Finish to
complete and save the survey.
Use this option to view and add
information about visitors to your web site.
Click Visitor Info from the main function menu to navigate to the Visitor Info function. It contains the
following options – Advanced Tracking, Info Tag, Actions, Live Interaction, Customer Groups, and User
List.
This section will take you through
each of the Visitor Info options and
how to use them.
Advanced Tracking
This
is an example of how you can use the scripts generated on the Advanced Tracking
and Info Tag pages for your web site. To add tracking to your existing shopping
cart pages, call the javascript function onclick of the link.
Old
code:
<a
href="http://192.168.0.9/sears/ebookman-cart.htm" >
<img
alt="Buy Options"
src="http://192.168.0.9/sears/images/atc_button.gif"
border="0" width="35" height="33"></a>
New
code:
<a
href="http://192.168.0.9/sears/ebookman-cart.htm"
onclick="javascript:addToCart('1091626','08098093000','8 MB
eBookman','229.99'); ">
<img
alt="Buy Options"
src="http://192.168.0.9/sears/images/atc_button.gif"
border="0" width="35" height="33"></a>
Apart from the actions already
provided for tracking, you may want to track other visitor actions on your web
site. For example, you may want to tag information about users who opt to pay
by check instead of credit card. This option enables you to add such tags for
information and use it to track the event. You can have a maximum of 20 info
tags.
1.
Click Visitor Info.
Select Info Tag. You see the Info
Tag screen. The details you can view are:
2.
List of Info Tag name –
Click on the info tag name to view details. You see the Info Tag Details
screen.
3.
Select Info Tag – Select
the info tag to get the code.
4.
Delete – Click on
the red cross to delete the info tag and proceed.
5.
Select all info tags – Click
on this link to select all info tags.
6.
Preview and select the
info tag code – Click on this link to preview and select the info tag code.
To add info tags, specify the
following information:
1.
Specify the Info Tag
Name. This is the unique
identifier of the Info Tag. For example, Web site.
2.
Select the Info Tag
Type from the drop-down list. You can choose from Text and Number.
3.
Click the Add hyperlink
to add the info tag and proceed.
Use this option to make changes to existing info tags. To
make changes, do the following:
1.
In the Info Tag screen, click the Info Tag Name to select the info tag, which you want to modify.
2.
Make the necessary changes and click Update.
You can track events either
through the advanced tracking or the info tags features. This option enables
you to set certain actions to take place when those events occur. For example,
you are in the business of selling hardware and a visitor to your web site
purchases a Pentium 3 machine. When this event occurs, an action that you have
set ensures that an operator is alerted about this purchase. The operator can
pull the visitor into a chat to try and make the visitor upgrade the purchase
or even sell another accessory related to the purchase. Live interactions can
also be sent as actions.
Use the Actions option to view, add and modify actions based on events that
you specify. Whenever these events take place on your web site, the selected
operators will be informed. You can have a maximum of 15 actions.
- Click Visitor
Info. Select Actions. You
see the Actions screen.
- Select a value from the You can choose the number of records to be displayed per page
drop-down list. This value defines the number of action records you
can view on each page.
- The other details you can view on the Actions screen
are:
a.
Sl. No. – this is the
order in which the actions are recorded.
b.
Actions – this is
the name of the action. Click this to select an action that you want to view
details for or which you want to modify. You see the Action Details screen.
c.
Delete – click this
to delete the record of a selected action.
- Click Add a
new Action to add a new action to be taken. You see the Add Action
screen.
Use this option to add a new
action to be performed based on the event you define here.
- On the Actions screen, click Add a new Action. You see the Add Action screen.
- To add a new action, specify the following details:
- To add a new Live
Interaction, click the Click
here hyperlink. You see the Live
Interaction screen.
- Select the information tag from the Match For drop-down list for which
you want to find a match. This is the first criterion to define the event.
- Select a value from the Match Type drop-down list. Choose from -, >, <, and so on. This is the
second criterion to define the event.
- Specify a Match
Value. This is the value you want to use to qualify the event.
- Select the Action
Type to be taken based on the event. Select the E-mail radio button to send e-mail to operators informing them
of the event. Select the Alert radio
button to send an alert message to operators informing them of this event.
Select the Live Interaction
radio button to send a timed and context sensitive chat invitation to the
visitor based on the event. Select the Email to Customer radio
button to send email to customers whenever this pre-defined event occurs.
- Specify the Action
Target of the action to be taken. This is the e-mail address of the
operator to whom information about the event is sent by e-mail. Click Add to add the email address to
the Selected Operator list.
Note: The Action Target
field is enabled only if select the Action Type E-mail radio
button.
- To add an operator, select the name of the operator
from the Operator list and
click >>. This is the
operator who will receive e-mail based on the event. You can also select
all the operators from the Operators list and click >> to add
all the operators to the Selected Operators list.
To remove the operator from the Selected
Operators list select the name of the operator and click <<.
- Enter the Subject/Title for the action. When
you send Email to Customer or Email to Operator, this
becomes the subject line of the mail.
- Enter the Content to be sent. This forms the
body of the email whenever you send email to customers or operators.
- Click Submit to
save the information and proceed.
Use this option to edit actions
that you defined previously.
- In the Actions screen, select one of the Actions.
This is the action, which you want to modify. You see the Add Action
screen. Make changes as required:
- To add a new Live
Interaction, click the Click
here hyperlink. You see the Live
Interaction screen.
- Select the information tag from the Match For drop-down list for which
you want to find a match. This is the first criterion to define the event.
- Select a value from the Match Type drop-down list. Choose from -, >, <, and so on. This is the
second criterion to define the event.
- Specify a Match
Value. This is the value you want to use to qualify the event. For
details on how to create values, see Advanced
Tracking.
- Select the Action
Type to be taken based on the event. Select the E-mail radio button to send e-mail to operators informing them
of the event. Select the Alert radio
button to send an alert message to operators informing them of this event.
Select the Live Interaction
radio button to automatically send a timed and context sensitive chat
invitation to the visitor based on the event.
- Specify the Action
Target of the action to be taken. This is the e-mail address of the
operator to whom information about the event is sent by e-mail. Click Add to add the email address to
the Selected Operator list.
Note: The Action Target
field is enabled only if select the Action Type E-mail radio
button.
- To add an operator, select the name of the operator
from the Operator list and
click >>. This is the
operator who will receive e-mail based on the event. You can also select
all the operators from the Operators list and click >> to add
all the operators to the Selected Operators list.
To remove the operator from the Selected
Operators list select the name of the operator and click <<.
- Enter a Description
for the action.
- Click Submit to
save the information and proceed.
1.
Click Action.
Select Live Interaction. You see the
Live Interaction screen.
2.
Select a value from the You
can choose the number of records to be displayed per page drop-down list to set the number of Live Interaction records to be
displayed per page.
3.
Click Name to view
details of that live interaction.
4.
Click the Delete icon to delete that particular live
interaction.
5.
Click Add New Live
Interaction to add a new live interaction to the list. You see the Live
Interaction Details screen.
You can add a new live interaction by following these steps.
- Enter the Name
for the Live Interaction.
- In Properties of Live Interaction window step specify the Height and Width in pixels for the Live
Interaction window. You must also specify the background Color for
the window. You can specify standard colors such as red, blue, green and
so on. Alternatively, you can specify RGB values such as #00FF00 and so
on.
- In Image URL to be displayed, specify the absolute path of
the image to be displayed in the Live Interaction window. For example, http://www.livehelper.com/images/logo.gif.
This image must be stored on your web server.
- In Image URL on mouse over, specify the path of the image
to be displayed on moving the mouse over the previous image in the Live
Interaction window. For example, http://www.livehelper.com/images/logo.gif.
This image must be stored on your web server.
- In Close Invitation Image URL, specify the path of the image to be displayed that clients can click on to
close the Live Interaction invitation. For example, http://www.livehelper.com/images/logo.gif.
This image must be stored on your web server.
- In Close Image on mouse over, specify the path of the image
that closes the Live Interaction invitation when clients move their mouse
over it. For example, http://www.livehelper.com/images/logo.gif.
This image must be stored on your web server.
- Select the Scroll
Type for the Live
Interaction window from the drop-down list. Choose Horizontally if
you want the Live Interaction to scroll horizontally across the web page
or vertically if you want the Live Interaction to scroll Vertically
across the web page.
- In Number of repeats, specify the number of times the live interaction should scroll across the
screen.
- In Time Interval, specify the time interval
before the Live Interaction window is displayed again.
- Speed of
scrolling Select the speed of scrolling for the Live Interaction
window. Choose from Fast, Medium or Slow.
- Select a
value for Event to occur
when the invitation is clicked.
You can choose from No Event, Chat, EFAQ, E-mail,
Other URL.
a.
If you select Chat, EFAQ, or Email, you
see the Group Name drop-down list. Select the Group Name of the
group that will respond to the requests.
b.
If you select Other URL, you see the Enter URL
text box, which enables you to specify the URL to which the visitor should be
redirected upon clicking the live interaction. You also see the Open In
drop-down list. Select whether you want to open the URL in a new window or in
the same window.
- Click Preview to preview the Live
Interaction window.
- Click Submit to save the Live
Interaction and proceed.
- Click Reset to clear the information
entered for the Live Interaction.
Use this option to make changes to
an existing Live Interaction.
- Click Visitor Info. Select Live Interaction.
You see the Live Interaction screen.
- Click Name in the Live Interaction
screen to select the Live Interaction you want to modify. You see
the Live Interaction Details screen. Make changes as required to
the following:
Note: You cannot modify the
Name of the Live Interaction.
- In Properties of Live Interaction window step specify the Height and Width in pixels for the Live
Interaction window. You must also specify the background Color for
the window. You can specify standard colors such as red, blue, green and
so on. Alternatively, you can specify RGB values such as #00FF00 and so
on.
- In Image URL to be displayed, specify the absolute path of
the image to be displayed in the Live Interaction window. For example, http://www.livehelper.com/images/logo.gif.
This image must be stored on your web server.
- In Image URL on mouse over, specify the path of the image
to be displayed on moving the mouse over the previous image in the Live
Interaction window. For example, http://www.livehelper.com/images/logo.gif.
This image must be stored on your web server.
- In Close Invitation Image URL, specify the path of the image to be displayed that clients can click on
to close the Live Interaction invitation. For example, http://www.livehelper.com/images/logo.gif.
This image must be stored on your web server.
- In Close Image on mouse over, specify the path of the image
that closes the Live Interaction invitation when clients move their mouse over
it. For example, http://www.livehelper.com/images/logo.gif.
This image must be stored on your web server.
- Select the Scroll
Type for the Live
Interaction window from the drop-down list. Choose Horizontally if
you want the Live Interaction to scroll horizontally across the web page
or vertically if you want the Live Interaction to scroll Vertically
across the web page.
- In Number of repeats, specify the number of times the live interaction should scroll across the
screen.
- In Time Interval, specify the time interval
before the Live Interaction window is displayed again.
- Select the Speed
of scrolling for the Live Interaction window from the drop-down list.
Choose from Fast, Medium or Slow.
- Select a
value for Event to occur
when the invitation is clicked.
You can choose from No Event, Chat, EFAQ, E-mail,
Other URL.
a.
If you select Chat, EFAQ, or Email, you
see the Group Name drop-down list. Select the Group Name of the
group that will respond to the requests.
b.
If you select Other URL, you see the Enter URL
text box, which enables you to specify the URL to which the visitor should be
redirected upon clicking the live interaction. You also see the Open In
drop-down list. Select whether you want to open the URL in a new window or in
the same window.
- Click Preview to preview the Live
Interaction window.
- Click Submit to save the Live
Interaction and proceed.
- Click Reset to clear the information
entered for the Live Interaction.
You can group site visitors based
on their activities on your web site. This makes it easy for you to refer to
the details of only those visitors whose actions you are interested in, instead
of looking at all the users as in the user list. For example, you may want to
view details of only those users who have added items to their shopping cart,
but not purchased.
Use this option to view, add,
modify and delete customer groups.
- Click Visitor
Info. Select Customer Groups.
You see the Customer Groups screen.
- Click Add Customer
Group to add a new customer group. You see the Customer Groups – Add
screen.
- Click Name to
edit the details of the customer group. You see the Customer Groups – Edit
screen.
- Click View to
view the details of the customer group.
- Click Delete to
delete the customer group.
Use this option to add a new
customer group. In the Customer Groups – Add screen, specify the following
details:
- Specify the Name for the Customer Group. For
example, Gold.
- Select the Criteria from the drop-down list.
For example, Total Purchase Amount.
- Select the Match Type from the drop-down list.
For example, >.
- Specify the Value-1 for the criterion you
specified. For example 10,000.
- Specify the Value-2 for the criterion you
specified. This is enabled only if you selected Match Type – Between.
- Select the Condition Type from the drop-down
list. Select And to add another condition for the customer group.
Select Or to enable a search between either condition you specify.
- Click Submit to create the Customer Group.
- Click Cancel to ignore the changes.
Use this option to make changes to
details of existing customer groups. In the Customer Groups – Edit screen, make
changes as required to the following:
Note: You cannot change the
Name of the Customer Group.
1.
Select the Criteria from the drop-down list. For
example, Total Purchase Amount.
2.
Select the Match Type from the drop-down list. For
example, >.
3.
Specify the Value-1 for the criterion you specified.
For example 10,000.
4.
Specify the Value-2 for the criterion you specified.
This is enabled only if you selected Match Type – Between.
5.
Select the Condition Type from the drop-down list.
Select And to add another condition for the customer group. Select Or
to enable a search between either condition you specify.
6.
Click Update to update the Customer Group information.
7.
Click Cancel to ignore the changes.
The User List function provides
you a comprehensive summary of all actions performed by each visitor to your
web site. This summary of actions includes actions by both registered as well
as unregistered visitors.
Use this option to view User
lists. These are lists of registered and unregistered visitors to your web
site.
1.
Click Visitor Info.
Select User List. You see the User
List screen, which provides a summary of the User List. The information you can
view is:
2.
Customer Group Name – the name of the customer groups.
a.
View – click this icon to view details of the User List
for customers who belong to the group you selected.
b.
Registered Users – this provides information about the
number of registered users to your web site.
c.
Unregistered Users – this provides information about
the number of unregistered users to your web site.
Use this option to view details of users for each customer
group.
1.
In the User List screen, click the View icon adjacent to the
customer group for which you want to view the list of users. You see the User
List – Customer Groups screen.
2.
You see the name of the Customer Group. You can see the
list of Registered Visitors and the list of Unregistered
Visitors. Select a visitor from the drop-down list to view details of that
user. You see the User List Details screen.
3.
In the list of Registered Visitors, the details you can
view are:
a.
Name – this is the name of the registered visitor.
b.
Email – this is the e-mail address of the registered
visitor.
c.
View Details – click this to view details of the
selected visitor. You see the User List Details screen.
4.
In the list of Un-Registered Visitors, the details you can
view are:
a.
Name – this is the name of the unregistered visitor
b.
View Details – click this to view details of the
selected visitor. You see the User List Details screen.
You can access this screen from
the either the User List screen or the User List – Customer Groups screen. This
provides you detailed information about the selected visitor. The details you
can view are – User Profile, History and Chat Transcripts.
Stop Words are those words that
you do not want included during a search, and can be ignored during a search.
For example, if a visitor searches the E-FAQ for the question - do you have a
green rose?, the words do , you , have and a can be
ignored and the search needs only the words green rose. If do, you,
have and a are made stop words, then they are not searched in the
repository, and the site visitor gets answers faster.
- Click E-Faq. Select Stop Words. You see
the Stop Words screen.
- To add a stop word, specify the word in the Enter
a stop word to “add” or “delete” text box and click Add.
- To delete a stop word, specify the word in the Enter
a stop word to “add” or “delete” text box and click Delete.
Note: Stop Words are not
case sensitive.
Note: If you specify more
than one stop word, ensure that you separate them using commas.
The keywords and questions that
you enter here are stored into your company's repository. This repository will
grow and contain more keywords as your clients use it. When your clients click
the E-Faq button, they see a form in which they can type in the keyword or
question. They can either search for exact matches from the repository, or for
any words if the question contains multiple words. The clients can view the
answers selected according to matches, views or date.
Hence, key words are those words
that visitors will use during a search. You can have a maximum of 1000 key
words.
- Click E-Faq. Select Key Words. You see
the Keyword Manager screen.
- Select a value from the Select the number of
records to be displayed per page drop-down list to indicate the number
of key word records you want to see in a page.
- Click on one of the Keywords to select it.
This is the keyword whose details you want to modify.
- Click the Delete icon to delete the adjacent
keyword.
- Click Add a New Keyword to add a new keyword
to the list of keywords. You see the Keyword screen.
To add or edit keywords, specify
the following information.
1.
Enter the Keyword you
want to use. Eg: Support.
2.
Enter the Keyword
header you want to use. This is the word that describes the search results.
For example, the keyword header you enter is Define Livehelper. When a user
searches for a keyword Livehelper, the search results appear under the header
Define Livehelper.
3.
Give a Keyword
description for the keyword. This is especially useful when you have more
than one identical keyword. You can use this description to specify the context
of the various keywords. The description should not exceed 200 characters.
4.
Select the group name from the Group name drop-down list.
5.
Enter the Keyword
related URL. This is the URL related to the keyword on your
website. Eg: http://wwww.yourwebsite.com/support.html
6.
In Phone number 1, enter the first phone
number related to the keyword. Eg: 1-800-SUPPORT.
7.
In Description 1, provide a brief description for the first phone number related
to the keyword.
8.
In Phone number 2, enter the second phone number related to the keyword.
9.
In Description 2, provide a brief description for the second phone number related
to the keyword.
10.
In Phone number 3, enter the third phone number related to the keyword.
11.
In Description 3, give a brief description for the third phone number related to
the keyword.
12.
Click Submit to
save the information and proceed.
This option enables you to add
questions and answers to the E-Faq. These are displayed as related questions to
visitors who search for key words contained in these questions. You can add a
maximum of 100 questions.
- Click E-Faq. Select Questions. You see
the Questions and Answers screen.
- Select a value from the Select the number of
records to be displayed per page list. This is the number of question
and answer records you want to view in a page.
- Click on any of the Questions & Answers to
view details of the questions and answers. This is the set of question and
answer that you want to view or edit.
- Click the Delete icon to delete the adjacent
question and answer.
- Click Add a New Question to add a new set of
question and answer. You see the Question screen.
If clients are not satisfied with
the results of the E-FAQ search, they will be led to a screen wherein they can
ask a question to an operator of the same group or to some other group if
operators of the same group are not available. If the visitor is still not
satisfied, the visitor will be directed for chat with an operator.
If no operators are online the
client will see a call back screen. This call back request will be sent to the
operator who first logs in for the company.
To add or edit a question and its corresponding answer,
specify the following information:
- Enter the text for the Question (max 200
characters). This should not exceed 200 characters.
- Enter the Answer (max 1000 characters) for the
Question. This should not exceed 4000 characters.
- Select the Group name from the drop-down list.
- In Question header, enter a reference header
for the question not exceeding 50 characters.
- Enter a brief description for the question header in Header
description. This should not exceed 200 characters.
- Enter the URL related to the question in Related
URL.
- Click Submit to save the information and
proceed.
The statistics option enables you
to view statistics or reports of visitors and even your operators.
Click Statistics from the main function menu to navigate to the Statistics function. This consists of
the following options – Site Traffic, E-Commerce, Visitor
Profile, General and Operator Statistics.
Use this option to view
information about site traffic on your web site. These reports enable you to
see traffic patterns for your entire site and each individual page, identify
anomalies - such as hosting problems, view peak/off peak times, measure visits
to promotional, sign up and order pages for marketing effectiveness. All of
these reports provide you the business intelligence to make your website more
effective.
The reports you can view from this
option can be divided broadly into Page Views, Unique Visits, Top
10 and Summary.
A Page View is each
instance of a visitor loading a page on your web site.
A Unique Visit is a
visitor’s first visit to your site. While a visitor may visit your site and
view the home page three times, a contact page twice, and several other pages
once each, the Unique Visitors report records that person as one unique visitor
for the time allotted.
Note: However, if an
individual visits your site from both home and work, the person will be counted
as two distinct visitors.
Top 10 reports are reports
about accessibility of best ten pages and referrers of your web site. The top
ten pages refer to the pages most accessed on your web site, while the top ten
referrers refer to the sites from which the most number of visitors have
accessed your web site.
The Summary report provides
a summary of traffic to your web site.
Note: you can click any of
the hyperlinks present on the reports filter pages to navigate easily to the
next or previous report.
- Click Statistics from the main menu. Select Site
Traffic. You can view the site traffic reports. The reports you can
view are:
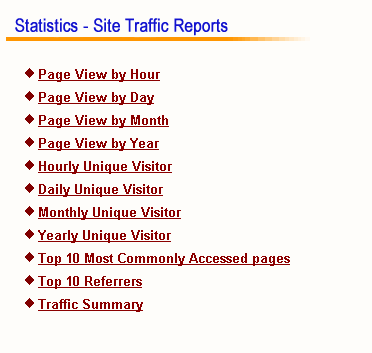
- Click the Page View by Hour hyperlink to get a
report with comparative information about pages viewed on an hourly basis
for the selected day. Each time a visitor to your web site loads a page on
your web site it is a page view. The data is formatted correctly to match
your time zone.
- Click the Page View by Day hyperlink to get a
report of information about pages viewed in the day for the selected
month.
- Click the Page View by Month hyperlink to get
a report of information about pages viewed in the month for the selected
year.
- Click the Page View by Year hyperlink to get a
report of information about pages viewed in a year for all the years in
the system.
- Click the Hourly Unique Visitor hyperlink to
get a comparative report of information of unique visits to your website
during the hour for the selected day. A unique visit is a visitor’s first
visit to your site. While a visitor may visit your site and view the home
page three times, a contact page twice, and several other pages once each,
the Unique Visitors report records that person as one unique visitor for
the time allotted.
Note: However, if an
individual visits your site from both home and work, the person will be counted
as two distinct visitors.
- Click the Daily Unique Visitor hyperlink to
get a report of comparative information about unique visitors for a day in
context of the month.
- Click the Monthly Unique Visitor hyperlink to
get a report of comparative information about unique visitors for a month
in the context of the year.
- Click the Yearly Unique Visitor hyperlink to
get a report of comparative information about unique visitors for the year
in the context of all the years in the system.
- Click the Top 10 Most Commonly Accessed Pages
hyperlink to get a report of information about the top 10 most accessed
web pages.
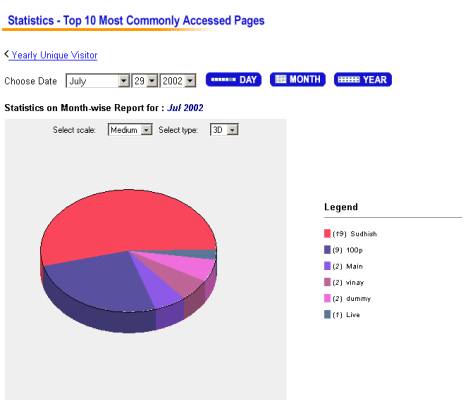
- Click the Top 10 Referrers hyperlink to get a
report of information about the top 10 referrers for your web site.
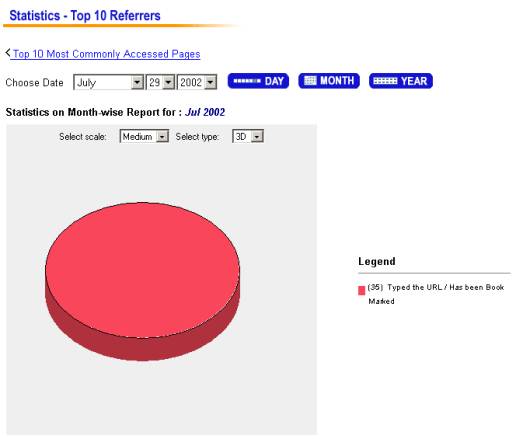
- Click Traffic Summary hyperlink to get a
report of information about the summary of traffic on your web site. This
report provides you a summary of Page Views for This Hour, Today,
and This Month, Unique Visitors for This Hour, Today,
and This Month, and Top Five Most Commonly Accessed. You can
also click the on-screen hyperlinks to view details by the hour, day,
month or year.
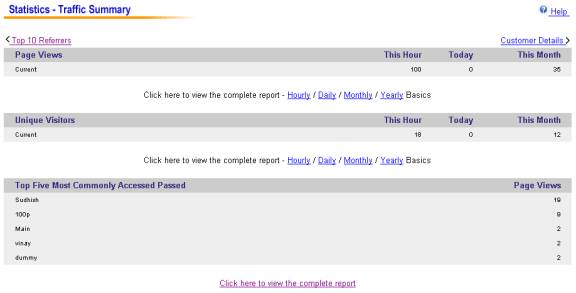
- Your reports will contain data that you require as
per your business. To retrieve this data, you need to perform a search for
the results. To do this, you must specify certain filter criteria.
- In the Choose Date drop-down lists, select
the date from which you want to view statistics.
- Click Hour to get a comparative report per
hour.
- Click Day to get a report of the number of
pages viewed for the day on an hourly basis.
- Click Month to get a report of pages viewed
for the month on an hourly basis.
- Click Year to get a report of pages viewed
for the year on an hourly basis.
- The report results are displayed in text as well as a
graphic format. You can export the textual results to MS Excel by clicking
on the MS Excel hyperlink provided. You can also export the textual
results to MS Word by clicking on the MS Word hyperlink.
Use this option to view
information about e-commerce from your web site.
- Click Statistics. Select E-Commerce Reports.
- You see the E-Commerce Reports screen.
- Click Customer Details to view a report on the
details of the customer to your web site.
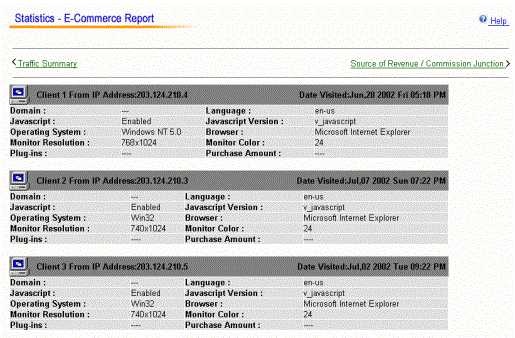
- You can view details of each customer such as the IP
address of the customer, the date and time on which the customer
visited the web site, and the Purchase Amount. In addition, you can view
information about the visitor’s system such as the Domain, Language,
JavaScript, JavaScript Version, Operating System, Browser,
Monitor Resolution, Monitor Color, and Plug-ins.
- Click Source of Revenue to view a report of
the revenue received from customers who purchased items from your web
site.
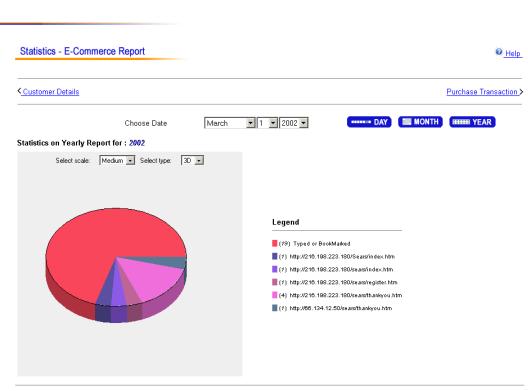
- You see details such as Referrer/Commission
Junction, Completed Transactions, Revenue, Percentage
of Revenue, and Graphical Value.
- Click Microsoft Excel to export text results
data to Microsoft Excel.
- Click Microsoft Word to export text results
data to Microsoft Word
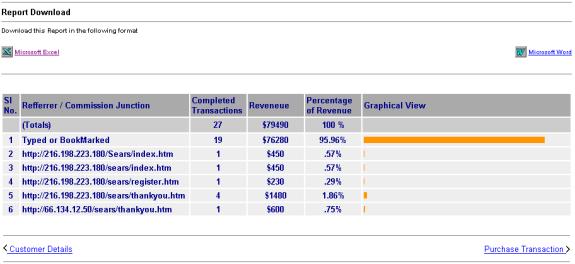
- Click Purchase Transactions to view a report
of information about purchase transactions. You can see details such as
the Referrer, Number of Visitors, Incomplete Transaction,
Complete Transaction, % of visitors who have completed
transactions, and the Graphical View.
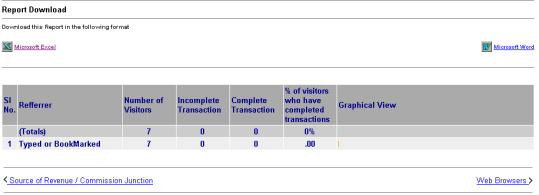
- Click Microsoft Excel to export text results
data to Microsoft Excel.
- Click Microsoft Word to export text results
data to Microsoft Word.
Use this option to view details of
profiles of visitors to your web site.
- Click Statistics. Select Visitor Profile.
You see the Visitor Profile screen.
- Click Web Browsers to view a report about
browser types and the versions used by your daily unique visitors. This
data gives you an understanding of your audience's Web sophistication
level and can justify optimizing your site for particular browser
features. Use this report to identify your audience's preferences, design
your pages to meet your audience's needs, and test your pages in popular
browsers. You can view the results in both graphic and text formats.
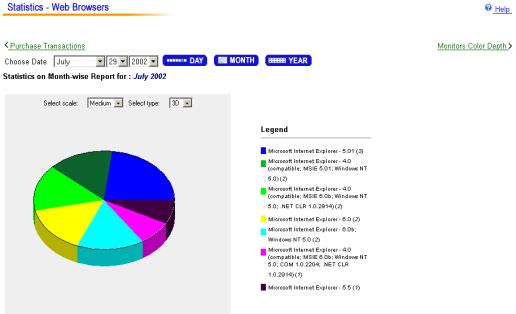
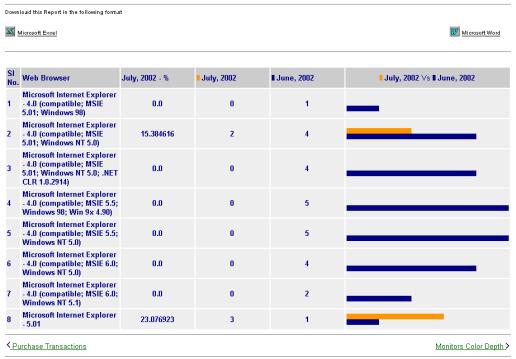
- Click Microsoft Excel to export the text
result data to Microsoft Excel.
- Click Microsoft Word to export the text result
data to Microsoft Word.
- Click Monitor Color Depth to view a report of
data on which color-depth the visitors to your web site have their
computers set to. Color-depth refers to the number of colors that can be
displayed on the screen. Use this report to identify your audience's
screen capabilities, design your pages to meet their needs, and test
images on your site with these settings to better understand user experience.
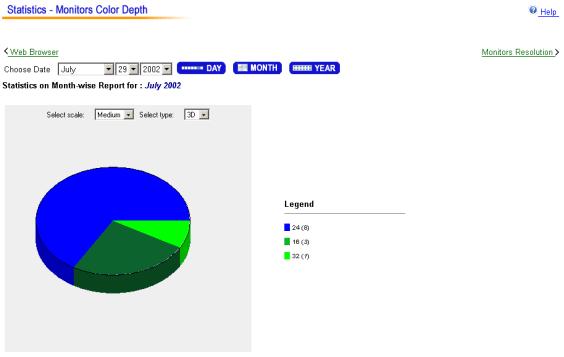
- You can view this report in both graphic and text
formats. The details you can view are Monitors Color Depth for the time
period you selected. You can see the details as a percentage of the total
as well.
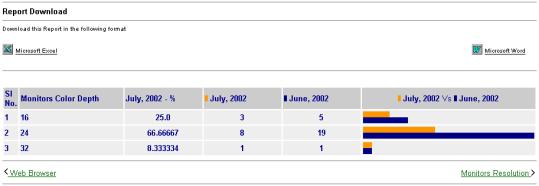
- Click Microsoft Excel to export the text
result data to Microsoft Excel.
- Click Microsoft Word to export the text result
data to Microsoft Word.
- Click Monitor Resolution to view a report of
visitors’ monitor resolutions for a time period you select. You can view
the details in both graphic as well as text format.
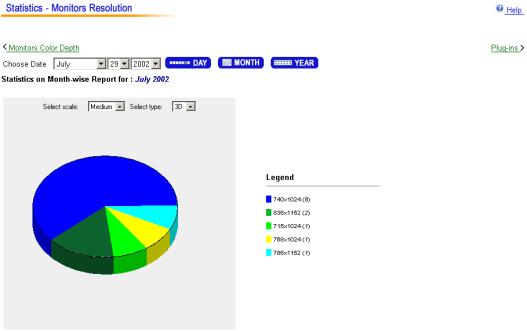
- The details you can view include a percentage of the
different types of monitor resolutions as compared to the total number.
The details you can view are:
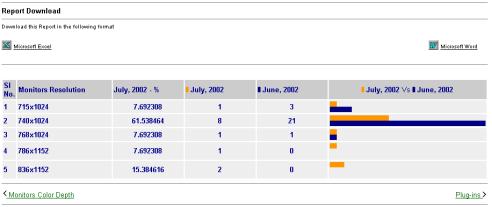
- Click Microsoft Excel to export the text
result data to Microsoft Excel.
- Click Microsoft Word to export the text result
data to Microsoft Word.
- Click Plug-ins to view a report of visitors
who visited your web site with different plug-ins.
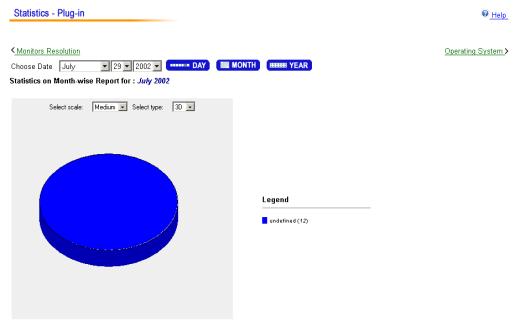
- The details you can view are the names of the
plug-ins, and the percentage of users visiting your web site with that
plug-in for the time period selected. The details you can view are:
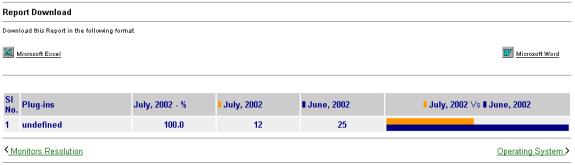
- Click Microsoft Excel to export the text
result data to Microsoft Excel.
- Click Microsoft Word to export the text result
data to Microsoft Word.
- Click Operating Systems to view a report about
web browsers used by your visitors. This is important since web pages tend
to display differently on different operating systems. Use this report to
find out more about your audience, and test your pages using those
Operating Systems.
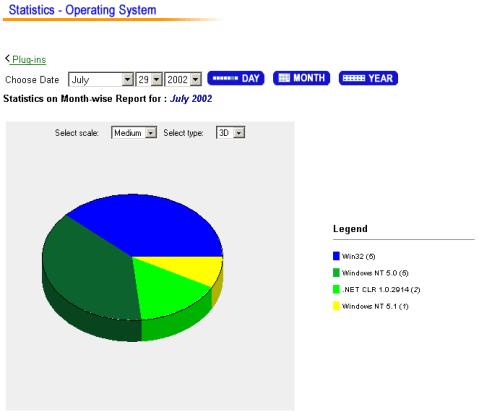
- You can also view a percentage of the number of users
with various operating systems. The details you can view are:
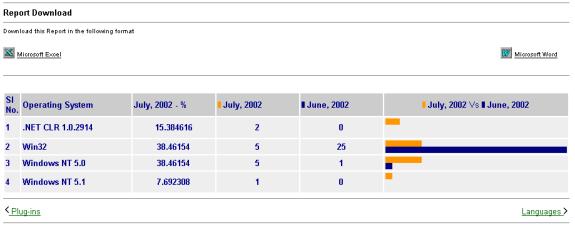
- Click Microsoft Excel to export the text
result data to Microsoft Excel.
- Click Microsoft Word to export the text result
data to Microsoft Word.
- Click Languages to view a report of the
languages used on various visitors’ systems.
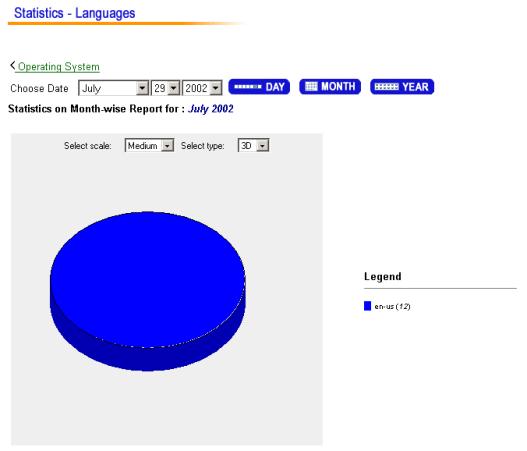
- The details you can view are:
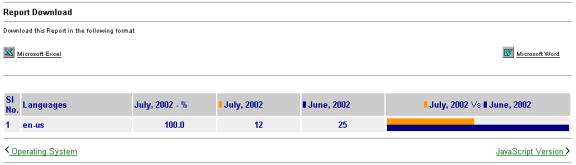
- Click Microsoft Excel to export the text
result data to Microsoft Excel.
- Click Microsoft Word to export the text result
data to Microsoft Word.
- Click JavaScript Version to view a report of
JavaScript Versions of your visitors’ machines for the time period
selected.
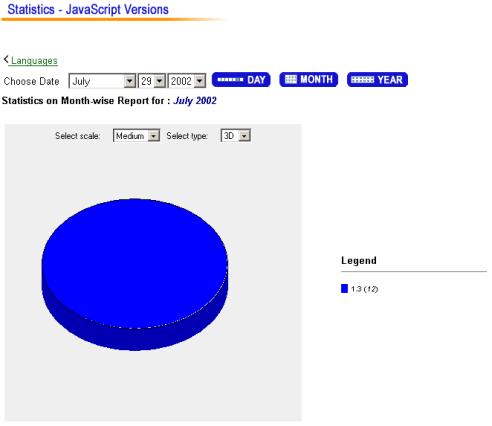
- The details you can view are:
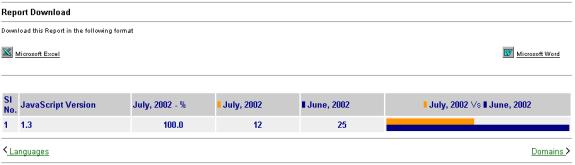
- Click Microsoft Excel to export the text
result data to Microsoft Excel.
- Click Microsoft Word to export the text result
data to Microsoft Word.
- Click Domains to view a report of the domains
from which your visitors have accessed your site during a particular time
period.
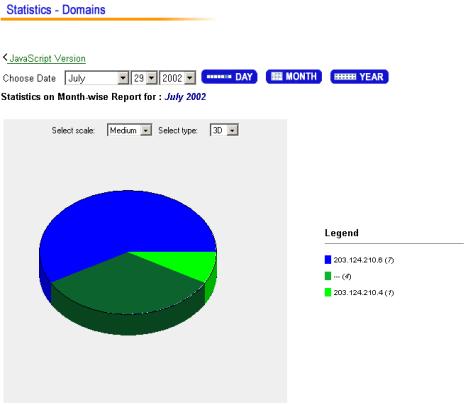
- The details you can view are:
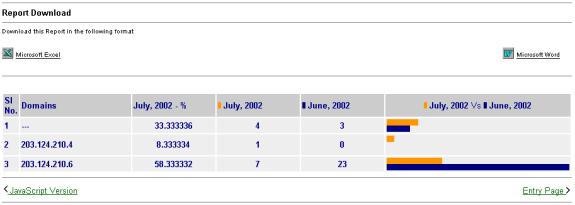
- Click Microsoft Excel to export the text
result data to Microsoft Excel.
- Click Microsoft Word to export the text result
data to Microsoft Word.
Use this option to view general
information.
- Click Statistics. Select General.
- Click Entry Page to view a report of the
various pages on your web site and how many users entered your web site
through those pages.
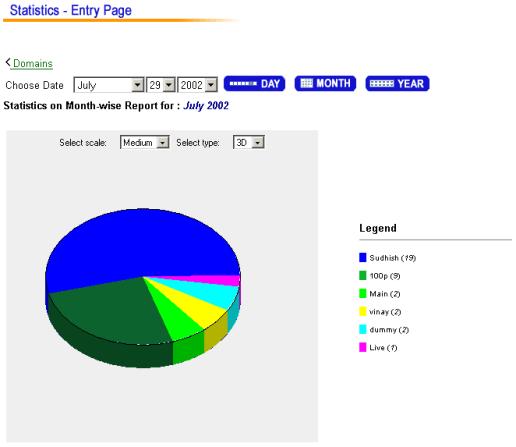
- The details you can view are:
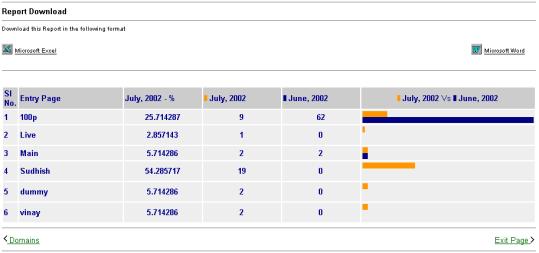
- Click Microsoft Excel to export the text
result data to Microsoft Excel.
- Click Microsoft Word to export the text result
data to Microsoft Word.
- Click Exit Page to view a report of the pages
from which visitors exited your web site.
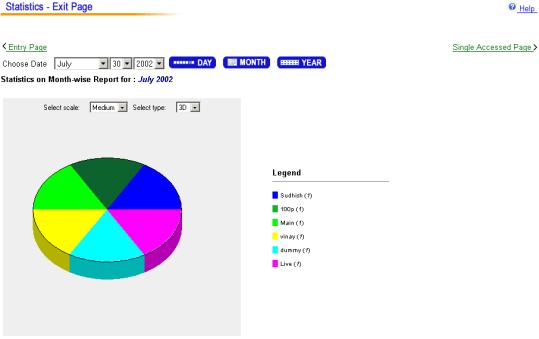
- The details you can view are:
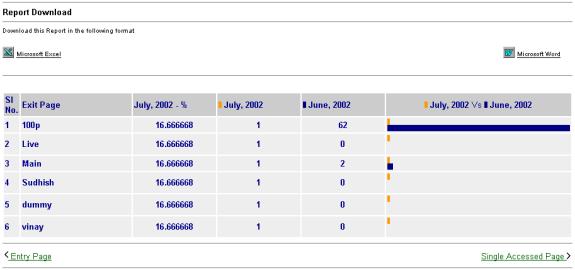
- Click Microsoft Excel to export the text
result data to Microsoft Excel.
- Click Microsoft Word to export the text result
data to Microsoft Word.
- Click Single Accessed Page to view a report of
the single page that visitors accessed.
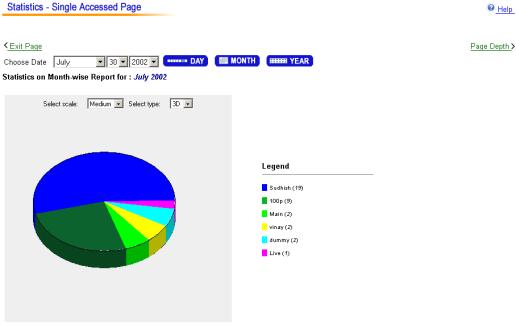
- The details you can view are:
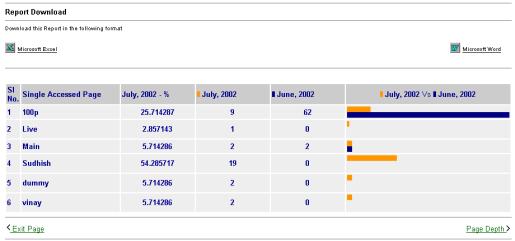
- Click Microsoft Excel to export the text
result data to Microsoft Excel.
- Click Microsoft Word to export the text result
data to Microsoft Word.
- Click Page Depth to view a report of data by
percentage and by total count, the depth of each visit to a page. In other
words, this indicates the number of links that visitors accessed from this
page on your web site. The details you can view are:
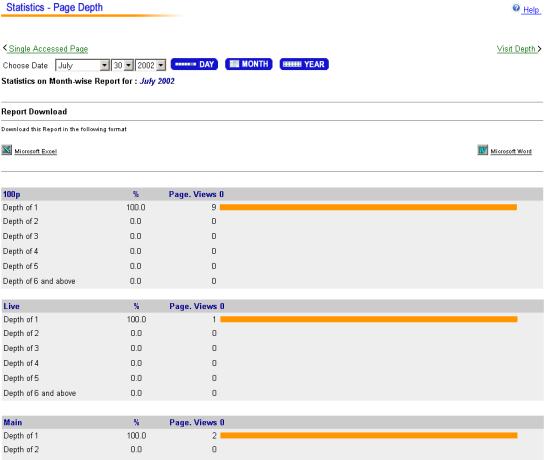
- Click Microsoft Excel to export the text
result data to Microsoft Excel.
- Click Microsoft Word to export the text result
data to Microsoft Word.
- Click Visit Depth to view a report of data by
percentage and by total count, the depth of each visit to your site. In
other words, the report indicates how many pages the average visitor to
your site views before leaving. The average visit depth section lists the
average visit depth to your site for the specified time period. Dividing
the page views by the number of visits for the specified period derives
average visit depth. Use this report to identify how deep your visitors are
willing to travel on your web site, determine how many of your visitors
are willing to explore your site as far as you would like, and optimize
your messaging to reach visitors before they exit.
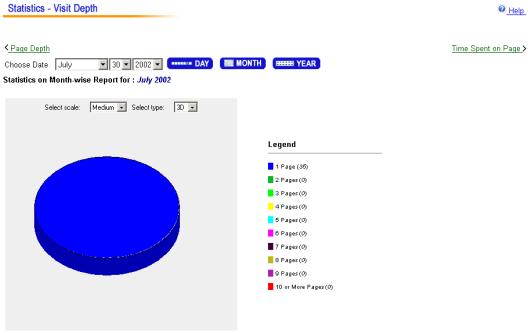
- The details you can view are:
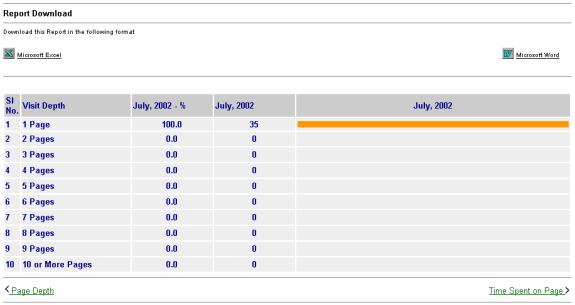
- Click Microsoft Excel to export the text
result data to Microsoft Excel.
- Click Microsoft Word to export the text result
data to Microsoft Word.
- Click Time spent on Page to view a report of
the amount of time visitors spent on a page on your web site.
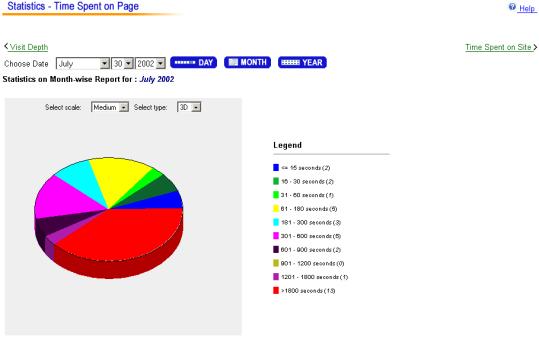
- The details you can view are:
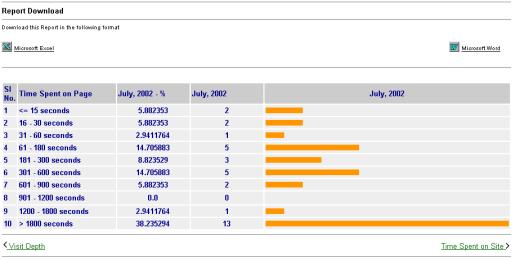
- Click Microsoft Excel to export the text
result data to Microsoft Excel.
- Click Microsoft Word to export the text result
data to Microsoft Word.
- Click Time spent on Site to view a report of
the amount of time visitors spent on your web site.
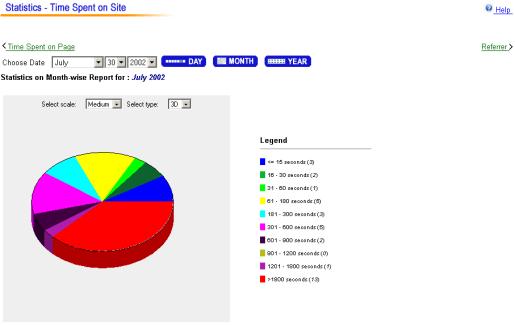
- The details you can view are:
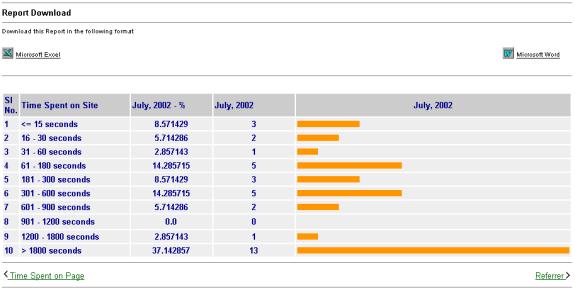
- Click Microsoft Excel to export the text
result data to Microsoft Excel.
- Click Microsoft Word to export the text result
data to Microsoft Word.
- Click Referrer to view a report of the
referrer sites from which visitors came to your web site.
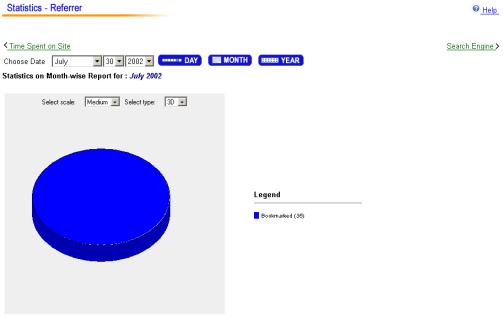
- The details you can view are:
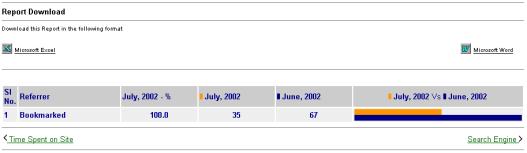
- Click Microsoft Excel to export the text
result data to Microsoft Excel.
- Click Microsoft Word to export the text result
data to Microsoft Word.
- Click Search Engine to view the statistics
about the various search engines your visitors used during a particular
time period. You can also add and configure new search engines that you
wish to use. You see the Search Engine screen.
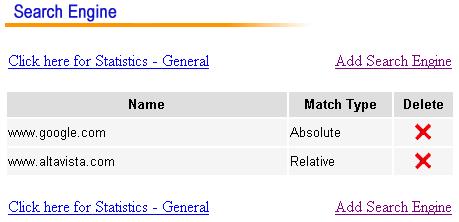
- Click the Delete icon to delete an existing
search engine.
- Click Add Search Engine to add a new search
engine. You see the Add Search Engine screen.
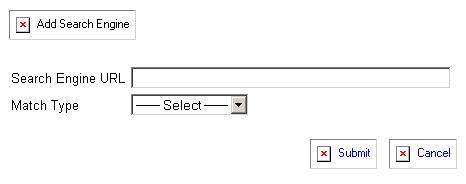
- Enter the name of the Search Engine URL. For
example, www.google.com.
- Select the Match Type from the list. Choose Absolute
to search using the exact phrase. Select Relative to search using
any word from the phrase.
- Click Submit to add the search engine.
- Click Cancel to ignore the add engine
operation.
Use this option to view the
in-query status for all operators, in-query volume (Text and Voice), and total
number of in-queries till date, details about the representative logins.
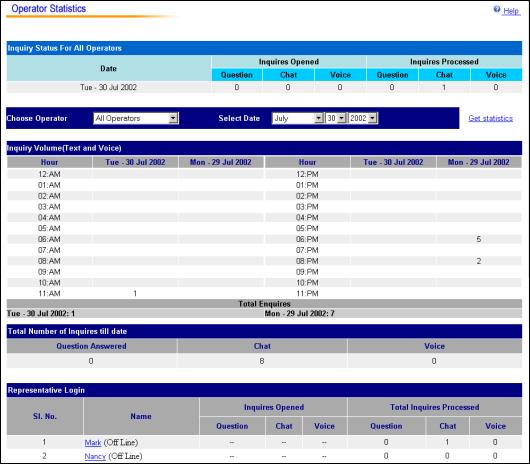
- You can view the statistics for operators or for
groups. Select the appropriate radio button to make you selection. From
the drop-down list that is enabled based on your selection, select the
particular operator or the group.
- In the Choose Date drop-down lists, select
the date from which you want to view statistics.
- Click Get Statistics to view the details of
the statistics:
- Click Microsoft Excel to export the text
result data to Microsoft Excel.
- Click Microsoft Word to export the text result
data to Microsoft Word.
- Click on the Name of any Representative to
view the statistics of that particular operator in a graphical format,
total number of in-queries till date, list of Chat Transcripts on the
selected date.
chat details
You can view the details by click on a particular chat. The
details you can view are, Chat Start Time, Chat End Time, Chat Duration, Chat
Starting Page, Operator, Browser, Client IP, Referrer and the Chat Transcript.
Use this option to define the search
you want to perform.
Click Search from the main
function menu to navigate to the Search function.
- Specify the various criteria and the value.
- Click Additional Requirement to add other
search criteria.
- Click Next. You see the Search Results screen.
Use this option to view search
result.
Use this option to download the
Operator Console exe. files to your system.
- Click Download from the main function menu to
navigate to the Download function.
- Select the Run this program from its current
position radio button to run the program from the Livehelper server.
You must be connected to the Internet to be able to use this option.
- Select the Save this program to disk radio
button to save the downloaded exe file to your desktop.
- Double-click livehelper.exe on your desktop
and complete the setup.
- Click Next to proceed to the next step.
- After you install the Operator Console, click Start
Menu > Program Files >Livehelper Operator Services 4.0 to
start the Operator Console.
Use this option to logout of
Livehelper.
Click Logout from the main
function menu. You are logged out of the Administration section.
9
Setting up the
Operator Console
As an operator, you will need to
setup the Operator Console on your system to suit your requirements. Note that
the setup you configure is local to your machine only. You can set up Preferences,
Preset Messages, Sounds, Push Links, Users/Smiley, Email
Settings, Browse Color, Miscellaneous, Spell
Checker, and even do a Remote Setup. The following sections will
take you through each of these options and how you can use them.
To login to the Operator Console,
double-click the Operator icon on your desktop or any other location
where it is installed. Alternatively, click Start Menu > Program Files
>Livehelper Operator Console. You see the Livehelper Login window.
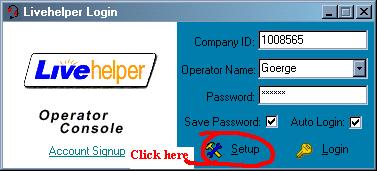
Specify the following details to
log into the Operator Console.
- Enter your Company ID. This is the unique
identifier associated with your organization that is provided to your
Administrator at the time of signup.
- Specify your Operator Name or select it from
the drop-down list.
- Enter your Password.
- Select the Save Password check box to save
your password. If you select this check box, you do not have to specify
your password each time you log into the Operator Console.
- Click Login to log into the Operator Console.
You see the Operator Console. By default, the tab that is open is the
Operator tab.
- Select the Auto Login check box to do an
automatic login to the Operator Console at the time of startup. This means
that whenever you log into your system, the Operator Console is
automatically started and you are logged in.
- Click Setup to go to the Operator Console
Settings setup. You see the Operator Console Settings window. This
contains the following options - Preferences, Preset Messages,
Sounds, Push Links, Users/Smiley, Email Settings,
Browse Color, Miscellaneous, Spell Checker,
and Remote Setup.
- Click Preferences in the Options Navigator.
You see the Preferences window.
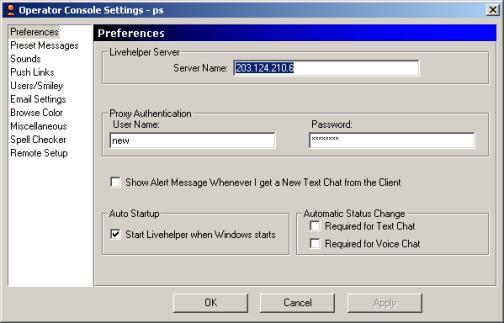
- Specify the Server Name. This is common for
all Companies and Operators and it should be Operator.Livehelper.com You
cannot modify this.
- In the Proxy Authentication group box, specify
the User Name and Password for your Proxy if you are behind
a proxy server.
- Select the Show Alert Message Whenever I get a New
Text Chat from the client check box to receive alerts when clients get
into a text chat with you.
- In the Auto Startup group box, select the Start
Livehelper when Windows starts check box if you want the Operator
Console to start as soon as Windows starts.
- In the Automatic Status Change group box,
select the Required for Text Chat check box if you want your
availability status to be changed to busy the moment you accept a text
chat. Select the Required for Voice Chat check box if you want your
status to be changed to busy the moment you accept a voice chat. If you do
not select these check boxes, you can change your availability status
manually.
- Click OK to continue.
- Click Cancel to ignore the preferences.
- Click Apply to apply the changes you made.
As an operator, you can create
preset messages locally. Preset messages are messages you want to send to your
clients. These could be welcome messages, chat session closing messages, and so
on. These help standardize your messages and save you the effort of typing the
messages time and again. With this option, you can create message groups, and
messages. You can also modify or delete messages as per your requirement.
- Click Preset Messages in the Option Navigator
to view all the messages you created locally. You see the Preset Messages
window.
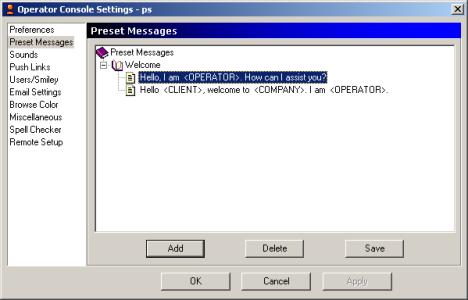
- Click Add to add a new preset message or
message group. You see the Add Preset Message Group or Add Preset Message
windows based on your selection in the tree.
- Select a preset message and click Delete to
delete the selected message.
- Click Save to save the preset messages.
This option enables you to add
Preset Message Groups.
- In the Preset Messages window, you see the default
group Preset Messages. This is the root of all Preset Message
Groups and Preset Messages you will add.
- Select the root Preset Messages and click Add
to add a Message Group. You see the Add Preset Message Group window.
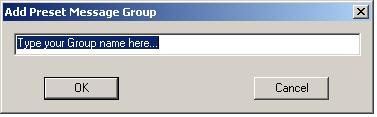
- In the Type your Group name here text box,
specify the name for the message group you want to create. For example,
Welcome.
- Click OK to add the Message Group.
- Click Cancel to cancel the operation.
Use this option to add Preset
Messages to a Preset Message Group you created. This option also enables you to
add Preset Keys such as Client name, Operator name and Company name in
your preset message. Apart from this, you can also add Smileys to your
preset messages.
- In the Preset Messages window, you see the default
group Preset Messages. This is the root of all Preset Message
Groups and Preset Messages you will add. You also see the Preset
Message Groups you added.
- Select the Message Group to which you want to
add the Preset Message and click Add to add a Message. You see the
Add Preset Message window.
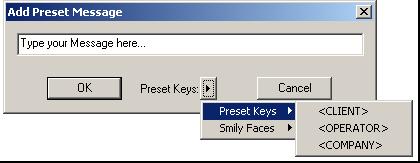
- In the Type your Message here text box, specify
the message you want to create. For example, Hello <CLIENT>. I am
<OPERATOR>. How can I help you?
- To add information such as the name of the client,
your operator name and your company name as part of the message, as shown
above, click Preset Keys > Preset Keys and select the preset key
you want to add to your message.
- To add a Smiley, click Preset Keys
> Smileys and select the smiley you want to add to your message.
- Click OK to add the Preset Message.
- Click Cancel to cancel the operation.
To delete a message group that you
no longer require, do the following:
- In the Preset Messages window, select the Preset
Message Group that you want to delete.
- Click Delete to delete the selected Message
Group. You see a message that asks you to confirm that you want to delete
the entry. Click Yes to delete the message group. Click No
to cancel the delete operation.
To delete a message that you no
longer require, do the following:
- In the Preset Messages window, select the Preset
Message that you want to delete.
- Click Delete to delete the selected Preset
Message. You see a message that asks you to confirm that you want to
delete the entry. Click Yes to delete the message. Click No
to cancel the delete operation.
Use the Sounds option to configure
the sounds that should be played to alert you on the occurrence of certain
events.
- Click Sounds in the Option Navigator. You see
the Sounds window.
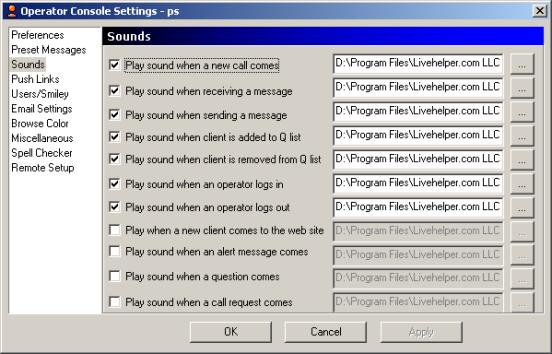
- Select the event name check box for which you want a
sound alert. For example, select the Play sound when a new call comes
check box to receive a sound alert whenever you get a new call. If you do
not clear an event check box, you will not receive a sound alert on the
occurrence of the event. However, the path of the sound file will be
stored, in case you enable it again.
- Click the ellipses … to select a local sound
file. This must be of the format .wav.
- Click OK to proceed.
- Click Cancel to cancel the operation.
- Click Apply to apply the configuration.
Use
this option to configure the Push Link Groups and Push Links you
will want to send to clients. Push Links helps in storing some frequently used
URLs of your web site to push it to clients when appropriate for clients to
view. The usage is similar to that of Preset Messages and Preset HTML.
With
this option, you can add Push Link Groups, and Push Links. You can also delete
links that you no longer require.
To
access the Push Links option, click Push Links from the Option
Navigator. You see the Push Links window.
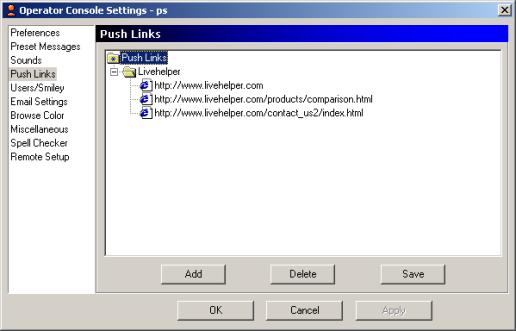
This
option enables you to add Push Link Groups.
- In the Push Links
window, you see the default group Push Links. This is the root of
all Push Link Groups and Push Links you will add.
- Select the root Push
Links and click Add to add a Push Link Group. You see the Add
Push Link Group window.
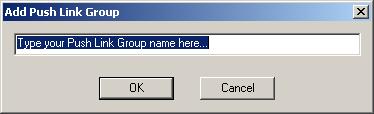
- In the Type your
Push Link Group name here text box, specify the name for the push link
group you want to create. For example, Livehelper.
- Click OK to add
the Push Link Group.
- Click Cancel to
cancel the operation.
- In the Push Links window, you see the default group Push
Links. This is the root of all Push Link Groups and Push Links you
will add. You also see the Push Link Groups you added.
- Select the Push Link Group to which you want
to add the Push Link and click Add to add a Push Link. You see the
Add Push Link window.
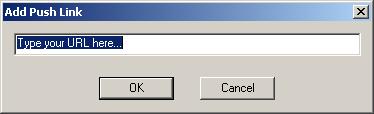
- In the Type your URL here text box, specify
the push link you want to create. For example, http://www.livehelper.com.
- Click OK to add the Push Link.
- Click Cancel to cancel the operation.
To delete a push link group that
you no longer require, do the following:
- In the Push Links window, select the Push Link
Group that you want to delete.
- Click Delete to delete the selected Push Link
Group. You see a message that asks you to confirm that you want to delete
the entry. Click Yes to delete the push link group. Click No
to cancel the delete operation.
To delete a push link that you no
longer require, do the following:
- In the Push Links window, select the Push Link
that you want to delete.
- Click Delete to delete the selected Push Link.
You see a message that asks you to confirm that you want to delete the
entry. Click Yes to delete the push link. Click No to cancel
the delete operation.
Use this option to view the names
of all operators using your system. You can also delete their information from
your local machine. This option also enables you to view the shortcuts for
smileys as a reference.
- To access the Users/Smiley feature, click Users/Smileys
from the Option Navigator. You see the Users/Smiley window.
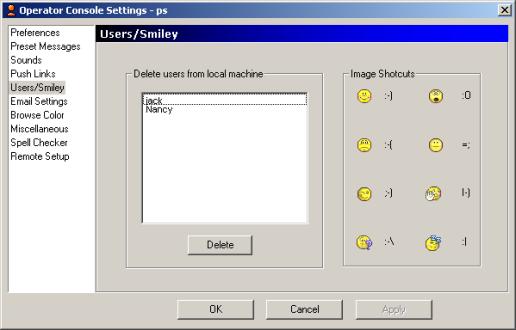
- In the Delete users from local machine group
box, you can see the names of the operators logging onto your system.
- Select the name of the operator that you want to
delete and click Delete. You see a message that asks you to
confirm the deletion of the user from the local system. Click Yes
to delete the user. Click No to ignore the delete operation.
Note: Deleting a user
automatically deletes all the operator’s local preset messages/push links.
- In the Image Shortcuts group box, you can view
smiley short cuts for reference.
Use the E-mail Settings
configuration option to configure e-mail alerts, properties and addresses for
your system.
- To access the E-mail Settings feature, click E-mail
Settings from the Option Navigator. You see the Email Settings window.
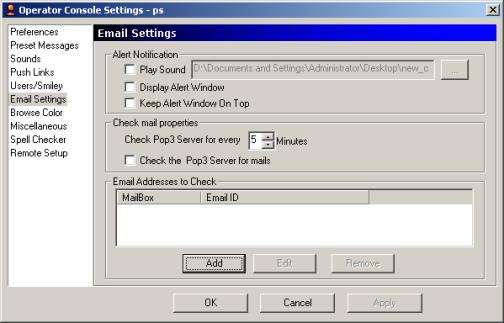
- In the Alert Notification group box, specify
the following details:
- Select the Play Sound check box to plays a
.wav file of your choice on receiving new mails. Specify the path of the
.wav file or click the ellipsis … to select it.
- Select the Display Alert Window to display
an alert window whenever new mail arrives in your Inbox.
- Select the Keep Alert window on Top to keeps
the alert window on top of all other open windows at any point of time.
- In the Check mail properties
group box, specify the following details:
- Use the spin control in Check Pop3 Server to
specify the time interval in minutes after which your Operator Console
will check your mailbox for new mails.
- Select the Check POP3 server for mails check
box to ensure that your Operator Console polls your POP3 mail server for
mails. If you do not select this check box, the Operator Console will not
poll the POP3 server for new mails.
- In the E-mail Address to Check
group box, you can view the Mailbox and E-mail ID details. In addition,
you can specify other e-mail addresses that the Operator Console must poll
for new mails.
- Click OK to proceed.
- Click Cancel to ignore the operation.
- Click Apply to apply the configuration
settings.
This option enables you to add a
new e-mail address or edit an exiting e-mail address to be polled.
- In the E-mail Settings window, click Add in
the E-mail Address to Check group box to add a new e-mail address.
To edit an e-mail address, select the address you want to modify and click
Edit.
- You see the Edit Email Info window.
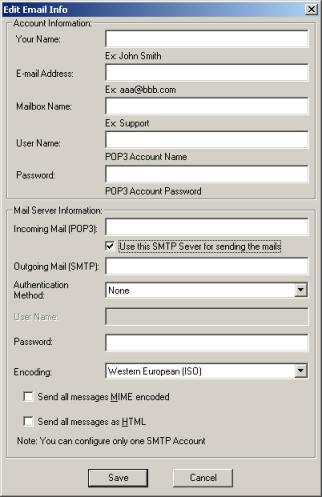
- In the Account Information group box, specify
the details of Your Name and the E-mail Address, the Mailbox
Name, and your User name and Password of your POP3
Account.
- To add or edit Mail Server Information, specify
the following information:
- Specify the name of the Incoming Mail (POP3) server.
- Select the Use this SMTP Server for sending
mails to specify the SMTP server to send mail.
- If you select the above check box, you must also
specify the Outgoing Mail (SMTP) name.
- Select the name of the Authentication Method if
required, from the drop-down list.
- Specify the User Name and Password to
be used for the authentication.
- Select the Encoding from the drop-down list.
- Select the Send All messages MIME encoded
check box to send all messages in MIME format.
- Select the Send All messages as HTML check
box to send all messages in HTML format.
- Click Save to save the e-mail address
information. You can see that the E-mail address has been added into the
Operator Console.
This option allows you to set the Browse
Color to the different Page IDs of your web site. This option is applicable
to you as the operator who created it and your local computer only. This
enables you to easily identify entries in the Browse List. As the operator, you
can immediately identify the visitors on particular pages and can keep track of
them better as they navigate through your web site.
- Click Browse Color from the Option Navigator
to navigate to this option. You see the Browse Color window.
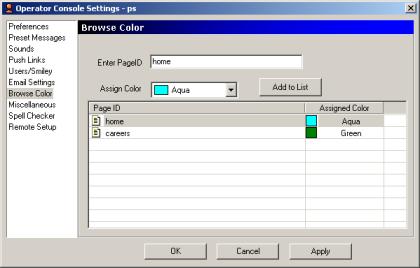
- In the Enter Page ID text box, specify the
name of the page that you want to identify.
- Select a value for the color to be associated with
the page from the Assign Color drop-down list.
- Click Add to List to add the Page ID
and the Color to the Browse Color list.
- Click OK to apply your changes and proceed.
- Click Cancel to ignore the operation.
- To delete a color setting, select the row for which you want to delete
the setting, right-click and select Delete.
- Click Apply to apply the configuration
settings.
Use this option to configure the
spell checker for text chats. Livehelper will conduct a spell check on the Text
Chat for all the items you select in this option.
- Click Spell Checker in the Option Navigator to
navigate to this feature. You see the Spell Checker window.
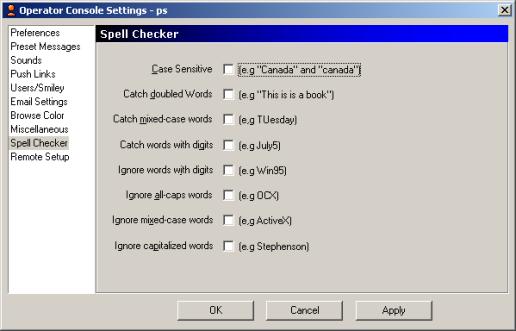
- Select the check box adjacent to the item for which
you want Livehelper to conduct a spell check. For example, if you select
the Case Sensitive check box, the spell checker will point out
words that should be in the upper case in your text chat.
- Click OK to proceed.
- Click Cancel to ignore the operation.
- Click Apply to apply the configuration
settings.
Use this option to configure the
remote setup settings on your machine. As an operator, you can do a remote
session using the default settings. However, you might require to speed up a
remote session in certain circumstances. This option enables you to change the
configuration settings for that remote setup based on your requirements.
- Click Remote Setup in the Option Navigator.
You see the Remote Setup window.
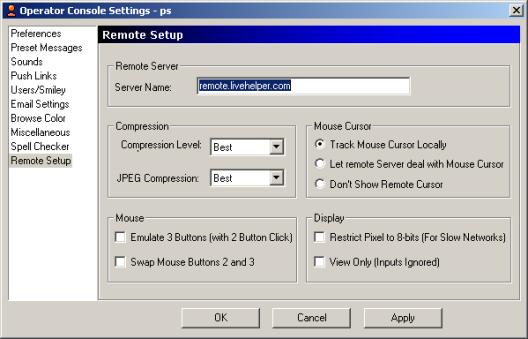
- In the Remote Server group box, you see the Server
Name. You cannot change this value.
- In the Compression group box, specify the following
details:
- From the Compression Level drop-down list,
select the level of compression you want. For example, Best. Your choice
would impact the speed of the remote session. The more the compression,
the faster the speed.
- From the JPEG Compression drop-down list,
select the type of compression you want for JPEG files. For example,
Medium. In this case, the clarity of the remote desktop will be medium.
Here also, the better the compression, the better the clarity.
Note: This will enable you
to speed up the remote session.
- In the Mouse Cursor group box, specify the following
details:
- Select the Track Mouse Cursor Locally radio
button to select the cursor depicting the client’s cursor locally.
- Select the Let remote Server deal with Mouse
Cursor radio button to select the remote server’s default cursor depict
the client’s cursor.
- Select the Don’t Show Remote Cursor radio
button if you do not want the client’s cursor to be displayed.
- In the Mouse group box, specify the following
details:
- Select the Swap Mouse Buttons 1 and 2 check
box to switch between the left and right mouse buttons. This is
particularly useful if you are a left-hander using a right mouse or vice
versa.
- In the Display group box, specify the
following details:
- Select the Restrict Pixel to 8-bits (for Slow
Networks) check box to speed up slow network connections. This reduces
the size of the images and hence speeds up the remote session.
- Select the View Only (Inputs Ignored) check
box to view the client’s desktop without being able to add any input. If
you select this check box, you can only view the actions taken by clients
on their desktops, but you will not have any control over the client’s
desktop.
- Click OK to proceed.
- Click Cancel to ignore the changes.
- Click Apply to apply the configuration
settings.
The Operator Console is what you,
as an operator will use to interface with your clients, respond to their
queries, and provide them support them as required. The Operator Console
consists of 4 menus and 4 tabs.
The 4 menus are the File
menu, the Tools menu, the Email menu and the Help menu.
The tabs that you can work with are the Operators tab, the Queue List
tab, the Browse List tab, and the Email tab. You can also access
the Queue List and Browse List Tabs from the Tools Menu.
Though the details you can view are the same in both, the tasks you can perform
through the Tools Menu and through the tabs vary. This section will take
you through the details of all the tasks and how you can perform these using
the operator console.
To login to the Operator Console,
double-click the Operator icon on your desktop or any other location
where it is installed. You see the Livehelper Login window. Specify the
following details to log into the Operator Console.
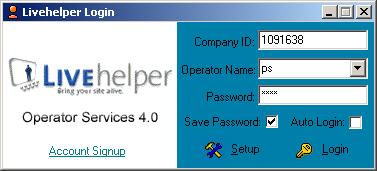
- Enter your Company ID. This is the unique
identifier associated with your organization that is provided to your
Administrator at the time of signup.
- Specify your Operator Name or select it from
the drop-down list.
- Enter your Password.
- Select the Save Password check box to save
your password. If you select this check box, you do not have to specify
your password each time you log into the Operator Console.
- Click Login to log into the Operator Console.
You see the Operator Console. By default, the tab that is open is the
Operator tab. The Operator Console consists of 4 menu options – the
File menu, the Tools menu, the Email
menu and the Help menu. The next
section will take you through the details of each of these menu options
and the tasks you can perform using the same.
- Select the Auto Login check box to do an
automatic login to the Operator Console at the time of startup. This means
that whenever you log into your system, the Operator Console is
automatically started and you are logged in.
- Click Setup to go to the Operator Console
Settings setup. See Setting up the Operator
Console for more details.
The File menu consists of
the Logoff and About options. To access the File menu,
click File or use the shortcut key.
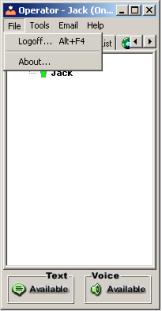
Use this option to logoff from the
Operator Console. To log off, do the following:
1.
Select Logoff…. Alternatively use the Alt+F4 shortcut
keys to logoff.
2.
You see a message that asks you to confirm the logoff. Click Yes
to logoff. You see the Livehelper Login window. Alternatively, click No if
you do not want to logoff.
Use this option to view details of
Livehelper’s copyright and version information. In addition, you can also view
the details of people involved in creating the product.
- Select About…. You see the About Livehelper
Operator Services window. This displays the Copyright, Version and URL
information of Livehelper Operator Services.
- Click Credits to view information about the
people who made this product possible.
Queue list …
The Queue List menu item
enables you to view information about clients in the queue waiting to be
attended. The details you can view are the same irrespective of whether you use
the menu option or click the Queue List tab. However, you may be able to
perform some extra actions from the Q List tab. This section will take you
through the Queue List menu and the options available along with information
about how to use these options.
- To access the Queue List, click Tools
and select Queue List. You see the Client Q List window.
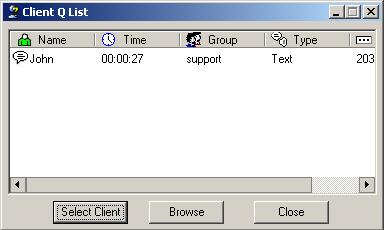
- The details you can view are the Name of the
client, the amount of Time for which the client has been waiting
for attendance, the Group to which the client wishes to
communicate, the Type of the chat the customer wants to initiate,
and the IP Address of the client.
- Click on a client Name to select the client
you want to chat with.
- In the Client Q window, click Select Client to
chat with the selected client.
- In the Client Q window, click Browse to get
information about the client. You see the Browse List window.
- Click Close to close the Queue List.
Browse List…
The Browse List enables you
to view details about clients visiting your web site.
- Click Tools. Select Browse List. You
see the Browse List window.
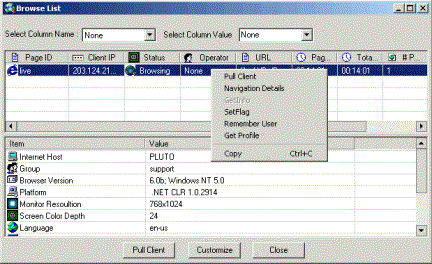
- The details you can view are:
- Page ID – this is the unique identifier of
the web page that the client is currently browsing.
- Client IP – this is the IP address of the
client’s machine. If you see the Information icon next to this, you can
right-click and select Get Info to get information about the
client. You see the Notes about Client window.
- Status – this is the status of the client.
This could be Chatting, Browsing, Waiting, or Chat cancelled.
- Operator – this column displays the name of
the Operator with whom the Client is in a chat. Else, it displays none.
- URL – this displays the URL of the page that
the client is currently viewing.
- Page Time – this displays the time that the
client has spent on each page.
- Total time – this is the total time for
which the client has been on the web site.
- Number of pages – this displays the total
number of web pages the client has visited on your web site.
- Browser type - this provides you the type of
browser used by your client.
- Click to select an entry in the Browse List. You can
view the following details as Items and Values:
- Internet Host – this is the name of the
Internet Host Company that the client is using.
- Group – this is the group with which the
client wants to chat. This is dependant on the group mentioned in the
tracker code for that Page.
- Browser Version – this is the version of the
browser that the client uses.
- Platform – This is the platform or operating
system the client is using.
- Monitor resolution – the resolution of the
client’s monitor
- Screen Color Depth – the depth of the
client’s screen color.
- Language – the language used on the client’s
machine.
- Last visit: This displays the last visit of
the client to your web site.
- Last chat – this displays the last chat the
client had with any of your operators.
- URL – the URL of the page that the client is
in is displayed here.
- Page Referrer – this is the link from where
the client came in for a chat.
- Page Title – this displays the title of the
page that the client is currently viewing.
- Once you have selected an entry in the Browse List,
you can also right-click to do the following:
- Pull the Client – select this right-click
option to pull a client for a chat. This option is available only on
right-click from the Browse List tab.
- View the Navigation Details of the Client,
such as:
i.
Page ID: The Page ID that client has visited.
ii.
Document: The Document or the URL the visitor is
currently viewing.
iii.
Referrer: It is the link from where your client has
come into your web site.
iv.
Title: The title of the page, the client has
opened.
v.
Time: The time that he has been there in each page.
- Click Get Info to view the information other
operators have specified about the client. This option is enabled only if
there is any information about the client, and is indicated by an icon.
You can see the following details:
i.
Operator – this is the name of the Operator who entered
the information.
ii.
Time – this is the time at which the information was
entered.
iii.
Select the Operator Name to view the Comments.
iv.
You can see the First Name, Last Name, E-mail
Address and Contact Info of the client. Click Add to add more
information. Click Close to close the window.
- Select Set Temporary Flag to set a flag for
a certain visitor to your web site. This is local to your machine. This
is a toggle option. Once you set a flag, you can also click Remove
Temporary Flag to remove the settings.
- Operators with administrative privileges can use
this option to use colors to identify visitors to their web site. Select Remember
User and select a color from the dialog box to identify the visitor.
This is also a toggle option. This means that you can also set the option
to Do Not remember User if the user has been set to remember.
Note: When you use the Remember
User option, all other operators will also view the same color set for the
visitor. If the other operators do not have administrative privileges, they
cannot remove the color settings.
- Select Get Profile to get the profile of the
visitor. You see the Profile window.
- Click Copy to copy the entire Browse list
details to a clipboard and save them for future reference.
The Text Chat menu option enables
you as an Operator to chat with another Operator.
- Click Tools. Select Text Chat. To
conduct a text chat, do the following.
- Select the Operator Name from the Operator tab.
This is the operator with whom you want to chat. You see the Text Chat
window.
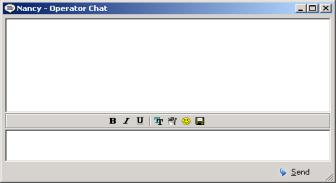
- Enter your message in the text box.
- If you wish to, you can also use various fonts,
colors, styles, and smileys in your message.
- Click Send to send the message.
This option enables you as an
Operator to conduct a voice chat with another Operator or a visitor to your web
site.
- If you want to initiate a voice chat with an
operator, click Tools. Select Voice Chat. You see the Voice
Chat window. If a visitor to your web site initiates a voice chat, you
will see
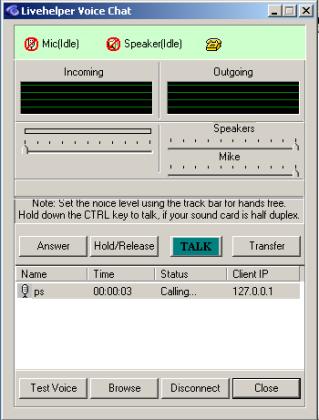
- Use the slide bars to adjust the noise level to
reduce the disturbance.
Note: that your visitors
cannot adjust this noise level. You as an operator have to make the
adjustments.
- Use the Outgoing slide bar to adjust the
volume levels for the speakers and microphones.
- You can view the following details:
- Name – this is the name of the operator
calling.
- Time – the time when the call was made.
- Status – the status of the call.
- Client IP – the IP address of the operator
making the call.
- Click Answer to answer the call.
- Click Hold/Release to put the call on hold or
release to release the call on hold.
- Click Talk to talk to your caller. If you do
not click this, your caller will not be able to hear you.
- Click Transfer to transfer the call to another
operator.
- Click Text Voice to test the voice.
- Click Browse to view the Browse List.
- Click Disconnect to disconnect from the chat.
- Click Close to close the dialog box.
This
option enables you to invite other operators for a conference.
The Create Button option enables
you to create buttons that you can use on your website. This option provides
you an easy step-by-step wizard to create buttons on need basis. The advantage
of having such buttons is that your clients can click these buttons to get in
touch with you easily to seek assistance or start a chat. You can also use the
tracking buttons to monitor the actions of your web site visitors. This option
generates a JavaScript based on the type of button you choose. Copy this
generated JavaScript and paste it on your web pages.
The wizard enables you to create
six types of buttons.
- Click Tools. Select Create Button. You
see the Create Button wizard.
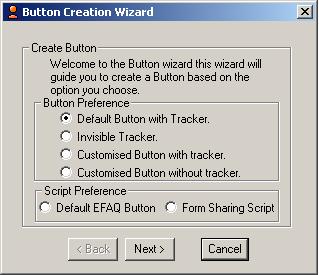
- The first step towards creating a web button is to
select the type of button you want to create. From the Button
Preference group box, you can select one of the following formats:
- Select the Default Button with Tracker radio
button to create a web button with the default image and tracker code.
- Select the Invisible Tracker radio button to
create a tracker code without any visible web button.
- Select the Customized Button with Tracker radio
button to create a customized web button with tracker code. This enables
you to select an image of your choice.
- Select the Customized Button without Tracker
radio button to create a customized web button without tracker code. This
also enables you to select an image of your choice.
- From the Script Preference group box, select the type
of script you would like to use.
- Select the Default EFAQ Button radio button
to create a default EFaq button. When visitors to your web site click
on this button, they can access the EFaq page, which enables them to
search for questions and answers based on keywords.
- Select the Form Sharing Script radio button
to create a Form Sharing Script button. This is useful if visitors have
problems filling out forms on your website. When visitors click on this
button, they enable operators to access their machine and help them to
fill the form.
- Click Next to proceed to the next step in the
wizard, which enables you to specify information about your company in the
Company Info group box.
Note: Your Company ID is
displayed by default and you cannot change it.
- Select the Group for the button from the Group
Name drop-down list. For example, Sales, Technical Support and so on.
When your clients click this web button, only those logged in operators
belonging to the selected group will receive calls. This option is
disabled if you select the Invisible Tracker radio button.
- In the Page ID text box, specify the page
title on which you would like to place the web button. For example, Home,
Help, Sales and so on.
- Click Next to save the information and
proceed.
- Click Back to return to the previous step to
make changes there.
Note: You can create only
one web button at a time. If you require another web button repeat the steps as
described above.
- The next step that you will complete is based on the
choice of buttons you made in the first step of the wizard.
- If you selected the Customized Button with
Tracker or the Customized Button without Tracker radio
buttons, you will specify information to customize them.
- If you selected the Default Button with Tracker
or the Invisible Tracker radio buttons, you will see the last step
of the wizard that enables you to view the generated JavaScript in the Static
group box.
- If you chose the any of the customized buttons, you
see the step that enables you to choose if you want a text link or an
image as a button. To make a choice, select the I would like to have
plain text link radio button or I would like to choose button
images radio button from the Static group box.
- If you selected the I would like to have plain
text link radio button, the Button Skin group box is disabled.
Click Next to specify information about the text link. Click Back
to return to the previous step to make changes there. In the Choose
Link Font group box, clear the Default check box to enter the
text for the link in Text Link. Select the Default check
box to use the default text. Click Font to view the Font dialog
box and choose your font settings. Click Next to continue. Click Back
to return to the previous step to make changes there.
- If you selected the I would like to choose
button images radio button, the Button Skin group box is
enabled. Enter the absolute path for the Online Image URL and Offline
Image URL. Web site visitors can use these images to view the online
or offline status of operators. Click Next to continue. Click Back
to return to the previous step to make changes there.
- The last step of the button wizard enables you to
view the generated JavaScript, select it and paste it to the requisite
area in your web site source code.
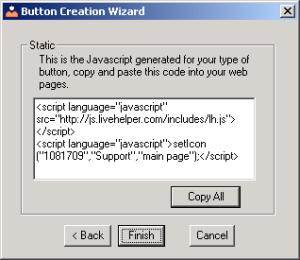
- Click Copy All to copy the generated
JavaScript to the clipboard and paste it on the source code of your
website.
- Click Finish to close the wizard.
- Click Back to return to the previous step to
make changes there.
- Click Cancel to cancel the create button
operation.
The Change Password option
enables operators to change their Operator Console login password.
- Click Tools. Select Change Password.
You see the Change Password window.
- To change the password, specify the following
information:
- Enter your current password in Old Password.
- Specify the New Password.
- Re-enter your new password in Confirm Password.
Note: Your password must
contain a minimum of 4 characters and a maximum of 16 characters.
- Click Change to apply the new password.
Note: The Administrator can modify your password if
required, through the Admin panel on the web.
Use this option to view statistics
of your Chat sessions. Note that this information is local to your machine. If
you log into another machine with the same User Name and Password, the
statistics you see there will be relevant to that machine alone.
- Click Tools. Select Operator Statistics.
You see the Operator Statistics window.
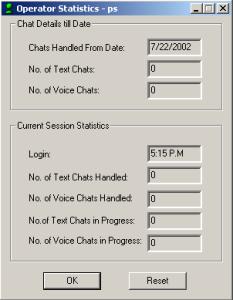
- In the Chat Details Till Date group box, you
can view chat details till the current date. You can view the following
details:
- Chats Handled From Date – this is the date
from which the chat sessions are being monitored.
- No. of Text Chats – this is the total number
of text chats handled.
- No. of Voice Chats – this is the total
number of voice chats handled.
- In the Current Session Statistics group box,
you can view details of the current chat session. The details you can view
are:
- Login – this is the time at which you logged
in to the current chat session.
- No. of Text Chats Handled – this is the total
number of text chats you handled in the current session.
- No. of Voice Chats Handled – this is the total
number of voice chats you handled in the current session.
- No. of Text Chats in Progress – this is the
total number of text chats in progress currently.
- No. of Voice Chats in Progress – this is the
total number of voice chats in progress currently.
- Click OK to close the Operator Statistics
window.
- Click Reset to reset all the values to zero
(0).
The Change Default Message feature
enables you to set, view or modify the Default Messages you use to greet
your customers.
- Click Tools. Select Change Default Message.
You see the Default Messages window.
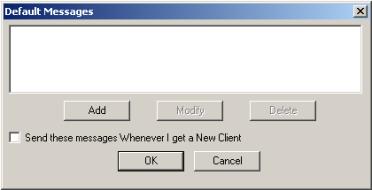
- You can view the default message. Click Add to
add a message. You see the Add Default Message window.
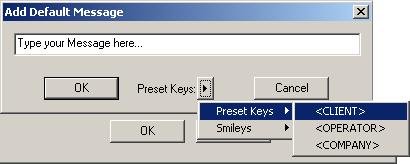
- In the Type your Message here text box,
specify the new message. Use the Preset Keys option to add Preset
Keys or Smileys to your message. Click OK to add your
message or click Cancel to ignore the add message operation.
- Select the existing message and click Modify
to make changes to the existing message. You see the Modify Default
Message window. Make the necessary changes and click OK to save
your changes. Click Cancel to ignore the changes you made.
- Select the existing message and click Delete
to delete the existing message.
- Select the Send these messages whenever I get a
New Client check box to send this message with all your future chats.
Use this option to refresh the Operator
tab to reflect the new status of the Operators in your company.
Click Tools. Select Refresh
to view the latest status of Operators. Although the Operator Tab is
refreshed periodically, this is useful if you want to view the latest status of
operators.
Use this option to view the
Operator Console window on top of all other windows that are currently open.
Click Tools. Select Always
on Top.
Use this option to view only those
operators who are online for your company. Deselect this option to view all
operators in your company irrespective of their online or offline status. You
can view the list of these operators in the Operator Tab.
Click Tools. Select Show
Only Online Operators. You see the list of online operators in the Operators
Tab.
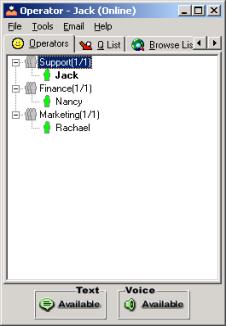
Use this option to receive an
alert message each time your Internet connection is disconnected. To use this
option:
Click Tools. Select Display
Internet Down Message.
Supervisors and managers can use
this option to monitor chat sessions between clients and operators. You must
have administrative privileges to be able to monitor chats.
- From the Operator Tab, select the Operator
whose chats you want to monitor.
- Click Tools. Select Show Admin Chat Window.
You see the Admin Chat window.
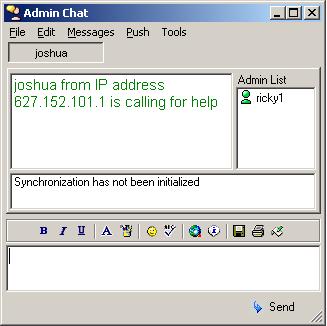
- You can view the name of the visitor with whom the
operator is chatting.
- You can view the name of the operator whose chat you
are monitoring in the Admin List.
- Use the text box to add new messages and click Send
to send the same.
- You can also use the following menu options:
- File – use this menu to save the chat, print
the chat and exit the chat. Click Save to save the chat. Click Print
to print the chat. Click Exit to exit the chat.
- Edit – use this menu to copy and paste the
chat contents to a clipboard. Click Copy to copy the text chat
contents. Click Cut to cut the text chat contents. These options
are enabled only if there is any content for cutting. Click Paste
to paste the text chat contents to a clipboard. Click Select All
to select all the contents of the text chat.
- Messages – use this menu to add or remove
preset messages or to select preset messages to add to the text chat.
- Push – use this menu to push links to the
visitor. You see the Push Links dialog. From the links, select the link
that you want to push. You can also view the list of Already Pushed
Links. From the Mode of Push group box, select New Window
to open the link in a new window on the visitor’s machine or select the
name of the Target Window to open the link on the target window.
Click Push to push the link. Click Close to close the
dialog.
- Tools – use this menu to
Super Administrative users have an
option to send messages that could be offline or online. Use this option to
view offline messages. These are messages that you received while you were not
logged into the Operator Console.
- Click Tools. Select Show Offline Messages.
You see the Offline Messages window. The details you can view are:
- Heading – the heading or subject of the message.
- Message – the message text.
- Received – the date and time on which the message
was received.
- Click OK to close the window.
- Click Clear All to clear all the records of
offline messages.
Note: If you are logged
into the Operator Console when the Super Administrator sends an online message,
you will receive an online message such as the one below:
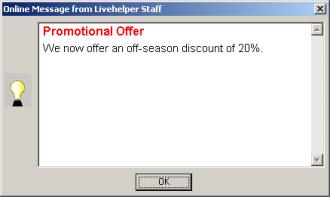
Use this option to send messages
to all other operators. Note that you must have administrative privileges to
use this option.
- Click Tools. Select Send Message to
Operators. You see the Send Message to Operators window.
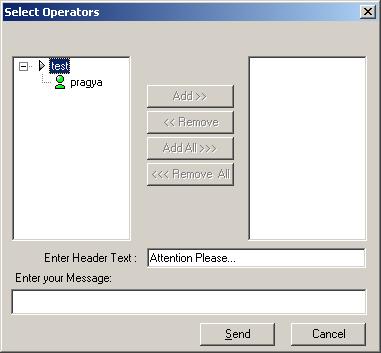
- Select the name of the operator from the list on the
left. This is the operator to whom you want to send the message.
- Click Add>> to add the operator to the
list of selected operators. Click Add All>> to add all the
operators to the list of selected operators. To remove an operator, select
the name of the operator from the list of selected operators and click <<
Remove. Click <<Remove All to remove all the operators
from the list.
- In the Enter Header Text field, specify the
subject of your message.
- In the Enter your Message field, specify your
message.
- Click Send to send your message.
- Click Cancel to ignore the message send
operation,
Use this option to set reminders
for yourself.
- Click Tools. Select Set Reminder. You
see the Set Reminder window.
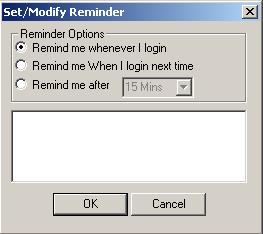
- From the Reminder Options group box, select the radio
button appropriate for you.
- Select the Remind me whenever I login radio
button to receive an alert whenever you login to the Operator Console.
- Select the Remind me when I login next time
radio button to receive an alert the next time you login to the Operator
Console.
- Select the Remind me after radio button to
receive an alert after a time period that you specify. When you select
this radio button, the drop-down list is enabled and you can select the
time period after which you want to receive the reminder.
- Click OK to apply the reminder settings. You
will see the Reminder Dialog window when you receive the reminder. You can
view the time at which the reminder was set, and the time of the last
reminder. Select the Do not show this Dialog again check box to
ensure that you do not want to see the same reminder again. Click OK to
close the window.
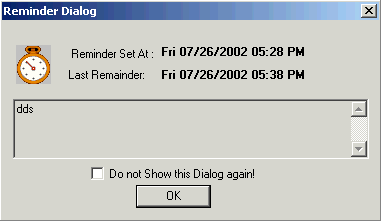
- Click Cancel to ignore the settings.
Use this option to show or hide
the status bar in chat windows.
Use this option to enable
integration with mobiles. You can use either of two options – Send only 1st
message and Send all the messages. If you select the Send only 1st
message option, only the first message will be sent to the mobile. If you
select the Send all the messages, all the messages will be sent to the mobile.
Note: To use this option,
your Administrator should have configured your Mobile ID and you should have
configured your SMTP account.
As an operator, you have the
option of managing your e-mails from the Operator Console itself. This is very
similar to the Outlook Express application wherein you can manage all your
e-mail accounts.
Use this option to send e-mails
from the Operator Console itself.
- Click E-mails. Select New Mails.
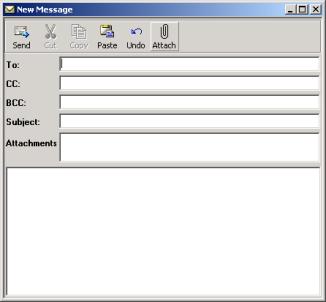
- Specify the To,
CC and Bcc addresses as required.
- Enter the Subject
for the e-mail and type your message in the space provided.
- Click the Attachments
to browse and select an attachment.
- Click the Copy,
Cut, or Paste icons as required to copy, cut or paste
information.
- Click Undo
to undo the previous step.
- Click Send
to send the mail.
Use this option to send e-mail
from your POP3 account. Note that you can send and receive mails only from your
POP3 account.
Click E-mail. Select Send
and Receive Mails.
Use this feature to add an e-mail
signature button onto e-mails you send. You cannot add an e-mail signature to
mails you have received.
- Click E-mail. Select Add E-mail Signature.
You see the Insert e-mail Signature button window.
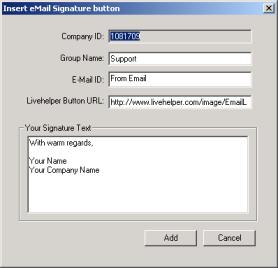
- You can view the Company ID using which you
have logged into the operator console. This cannot be edited.
- Specify the Group Name, E-mail ID, and
the Button code URL to customize the signature text.
- Click Add to add your e-mail signature to the
operator console. You see a message that informs you that the e-mail
signature has been successfully installed. You also see an option that
allows to you add the e-mail signature to your mail client such as Outlook
Express.
Note: The e-mail signature
is added to the main identity for the selected mail client.
Use this option to
enable or disable the e-mail signature before you sending e-mails from the
Operator Console. To do this, click E-mails. Select Enable E-mail
Signature.
Use this option to view your
e-mail Alert window. Click E-mail. Select E-mail Alert Window.
The details you can view are Group
name, the Account name under which you have received the e-mails,
the Number of E-mails in your Account and the Number of new E-mails that
you have received.
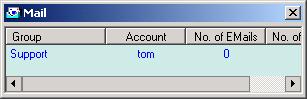
The Help menu has the links to
Livehelper’s FAQ page, the Admin page and Livehelper’s homepage. This allows
the Operator to have easy access to Livehelper’s web pages.
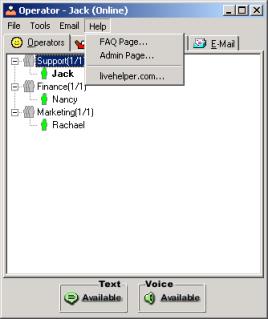
By clicking on this menu item a
new browser window opens the FAQ page of Livehelper.
This menu item opens the Admin
Page of Livehelper in a new browser window.
This menu item will help you to
reach the Livehelper Home Page.
Use this option to test and set
the microphone and speaker volume in the syetem.
The Operator Tab is the
default tab of the Operator Console. This displays all the Operators in your
company under various groups. As soon as you
Login only Online Operators will be listed in this tab. If you would like to
have all the Operators listed in this tab, navigate to Tools and select Show
only Online Operators.
Here, you can view all the
operators who have logged in using your Company ID, and the different groups
they belong to. Within the brackets, you can view the number of operators who
have logged in from the particular group and the total number of operators in
that Group.
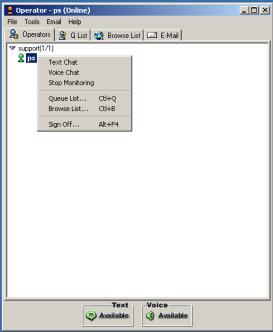
Select an operator name to select
the operator and right-click to choose Text Chat to start a text chat with the
selected operator.
Select an operator name to select
the operator and right-click to choose Voice Chat to start a voice chat with
the selected operator.
Select an operator name to select
the operator and right-click to choose Start Monitoring or Stop Monitoring to
start or stop monitoring the selected operator’s chat.
Click Queue List to
navigate to the Queue List tab.
Click Browse List to
navigate to the Browse List Tab.
Click Available on any of
the chats – Text or Voice to make yourself unavailable.
The images above show the various
color schemes provided in order to identify the various modes that the
operators are available on. That is, if the operator is:
- Available in both Text and Voice - Green
- Available in Text and busy in Voice - Blue
- Available in Voice and busy in Text - Yellow
- Busy in both Text and Voice – Red
The other option available in case
of color schemes is when the feature of “Voice Chat” is disabled and only the
“Text Chat” option is available. So if the operator is available then the color
is shown as Green and in case the operator is busy it is shown as Red.
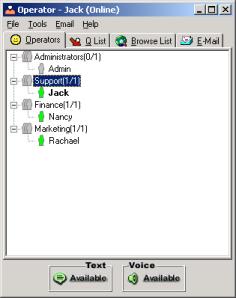
The Operator Tab is the default
tab or the first tab in the Operator Console. This tab shows all the Operators
in your company under various groups. As soon
as you Login only Online Operators will be listed in this tab. If you would
like to have all the Operators listed in this tab, then go to the Tools Menu
and => Uncheck “Show only Online Operators”.
Here, you can view all the
operators who have logged in using your Company ID, and the different groups
they belong to. Within the brackets, you can view the number of operators who
have logged in from the particular group and the total number of operators in
that Group.
The Q List tab enables you
to view information about clients in the queue waiting to be attended. The
details you can view are the same irrespective of whether you use the Queue List menu option or use this tab.
However, some of the actions you perform vary. This section will take you
through the Q List tab and the options available along with information about
how to use these options.
- Click the Queue List tab. You see the Q List
tab.
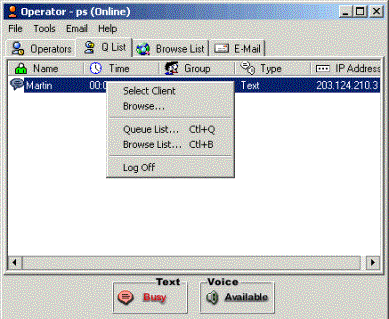
- The details you can view are the Name of the
client, the amount of Time for which the client has been waiting
for attendance, the Group to which the client wishes to
communicate, the Type of the chat the customer wants to initiate,
and the IP Address of the client.
- In the Q List tab, right-click on the client name and
select Select Client to chat with the selected client.
- In the Q List tab, right-click and select Browse
to view the Browse List.
- Right-click and select Queue List to view the Queue List in a new window. Alternatively, use
the short-cut menu provided to view the Queue List in a new window.
- Right-click and select Browse List to view the
Browse List in a new window. Alternatively
use the short-cut menu provided to view the Browse List in a new window.
- The details you can view are:
- Page ID – this is the unique identifier of
the web page that the client is currently browsing.
- Client IP – this is the IP address of the
client’s machine. If you see the Information icon next to this, you can
right-click and select Get Info to get information about the
client. You see the Notes about Client window.
- Status – this is the status of the client.
This could be Chatting, Browsing, Waiting, or Chat cancelled.
- Operator – this column displays the name of
the Operator with whom the Client is in a chat. Else, it displays none.
- URL – this displays the URL of the page that
the client is currently viewing.
- Page Time – this displays the time that the
client has spent on each page.
- Total time – this is the total time for
which the client has been on the web site.
- Number of pages – this displays the total
number of web pages the client has visited on your web site.
- Browser type - this provides you the type of
browser used by your client.
- Click to select an entry in the Browse List. You can
view the following details as Items and Values:
- Internet Host – this is the name of the
Internet Host Company that the client is using.
- Group – this is the group with which the
client wants to chat. This is dependant on the group mentioned in the
tracker code for that Page.
- Browser Version – this is the version of the
browser that the client uses.
- Platform – This is the platform or operating
system the client is using.
- Monitor resolution – the resolution of the
client’s monitor
- Screen Color Depth – the depth of the
client’s screen color.
- Language – the language used on the client’s
machine.
- Last visit: This displays the last visit of
the client to your web site.
- Last chat – this displays the last chat the
client had with any of your operators.
- URL – the URL of the page that the client is
in is displayed here.
- Page Referrer – this is the link from where
the client came in for a chat.
- Page Title – this displays the title of the
page that the client is currently viewing.
- Once you have selected an entry in the Browse List,
you can also right-click to do the following:
- Pull the Client – select this right-click
option to pull a client for a chat. This option is available only on right-click
from the Browse List tab.
- View the Browse List – select this to view
the Browse List.
- View the Q list – select this to view the
Queue List.
- View the Navigation Details of the Client,
such as:
i.
Page ID: The Page ID that client has visited.
ii.
Document: The Document or the URL he is in at the
moment.
iii.
Referrer: It is the link from where your client
has come into the site.
iv.
Title: The title of the page, the client has opened.
v.
Time: The time that he has been there in each page.
Click Get Info to view the
information other operators have specified about the client. This option is
enabled only if there is any information about the client, and is indicated by
an icon. You can see the following details:
i.
Operator – this is the name of the Operator who entered
the information.
ii.
Time – this is the time at which the information was
entered.
iii.
Select the Operator Name to view the Comments.
iv.
You can see the First Name, Last Name, E-mail
Address and Contact Info of the client. Click Add to add more
information. Click Close to close the window.
- Select Set Temporary Flag to set a flag for
a certain visitor to your web site. This is local to your machine. This
is a toggle option. Once you set a flag, you can also click Remove
Temporary Flag to remove the settings.
- Operators with administrative privileges can use
this option to use colors to identify visitors to their web site. Select Remember
User and select a color from the dialog box to identify the visitor.
This is also a toggle option. This means that you can also set the option
to Do Not remember User if the user has been set to remember.
Note: When you use the Remember
User option, all other operators will also view the same color set for the
visitor. If the other operators do not have administrative privileges, they
cannot remove the color settings.
- Select Get Profile to get the profile of the
visitor. You see the Profile window.
- Click Copy to copy the entire Browse List
details to a clipboard and save them for future reference.
- Select Log off to log off from the Operator
Console.
This feature allows the operator
to manage their E-mails right from their Operator Console itself. Here,
operators can view all the e-mails in the Inbox. They can also send e-mails
from the Operator Console and view the Sent Items and the Outbox. (For more
details refer E-Mail Tab Topic 6.3.3)
The images above show the various
color schemes provided in order to identify the various modes that the
operators are available on. That is, if the operator is:
- Available in both Text and Voice - Green
- Available in Text and busy in Voice - Blue
- Available in Voice and busy in Text - Yellow
- Busy in both Text and Voice – Red
The other option available in case
of color schemes is when the feature of “Voice Chat” is disabled and only the
“Text Chat” option is available. So if the operator is available then the color
is shown as Green and in case the operator is busy it is shown as Red.
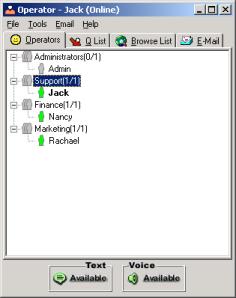
The Operator Tab is the default
tab or the first tab in the Operator Console. This tab shows all the Operators
in your company under various groups. As soon
as you Login only Online Operators will be listed in this tab. If you would
like to have all the Operators listed in this tab, then go to the Tools Menu
and => Uncheck “Show only Online Operators”.
Here, you can view all the
operators who have logged in using your Company ID, and the different groups
they belong to. Within the brackets, you can view the number of operators who
have logged in from the particular group and the total number of operators in
that Group.
When you right click on an Online Operators, this
Tool Menu will appear.
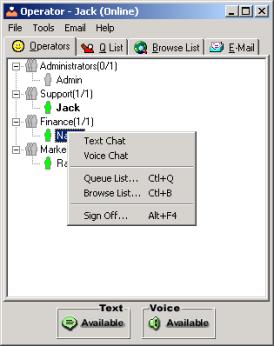
In the Image above there are three Operators logged
in, this is a screen shot taken from the machine where Jack is logged into the
Operator Console, this is understood by checking out the Title of the window
given as “Operator –Jack (Online)”.
Now in the screen shot above Operator Jack has right
clicked on Operator Nancy who is the other operator, besides Rachael, who is
Online at that point of time for this
particular company.
The Menu lists various options such as “Text Chat”,
“Voice Chat” etc.
Now clicking on “Text Chat” will initiated a Text
Chat with Operator Nancy from Jack. This case holds good for Voice chat too.
This is nothing but the Operator-to-Operator Text / Voice Chat.
The are other options are
·
“Q” lists
·
Browse lists
·
Sign off
Clicking on “Q” list or Browse list options would
open the “Q” list or the Browse list in separate window.
Q
List
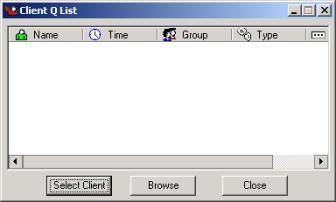
Browse List
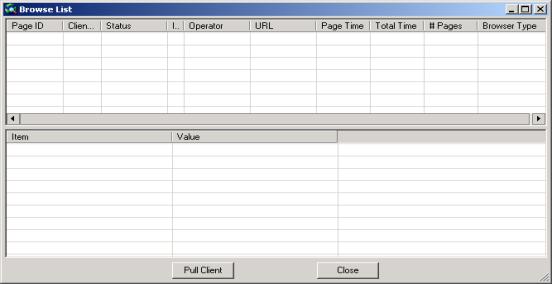
Please refer to the “Q” list, Browse List topics for
further details about the columns and the operations they perform.
The ‘Q’ List is a window wherein you could view all
the Customers waiting to be attended. The Operator is allowed to Select
Customers for a chat. Just right click on the Customers name and click on
“Select Client” from the pop up menu. Also provided in the Q List is
information about the time the Customer is pending in the ‘Q’ list, Group the
client wants to chat with, the Time for which he/she has been in the Q List for
and Type of Chat intended by the customer.
The Browse List displays the following details:
·
Page Id: The ID of the Page that the Client is
currently browsing.
·
Client IP: The Machine IP of the client who is
on site.
·
Status: This displays the Status of the Client
as whether he is currently Chatting, Browsing, Waiting or Chat cancelled.
·
Information: Here you can view the icon, which
shows whether there is any information stored of that client by any of the
operators.
·
Operator name: This column displays the name of
the Operator with whom the Client is in chat with. Else, it displays none.
·
URL: This displays the URL of the page the
client is currently in.
·
Page Time: This displays the time that the
client has spent in each page.
·
Total time: It is the Time for which the Client
has been on the site.
·
Number of pages: This shows the total number of
web pages the client has visited on your website.
·
Browser type: This gives you the Browser version
used by your client.
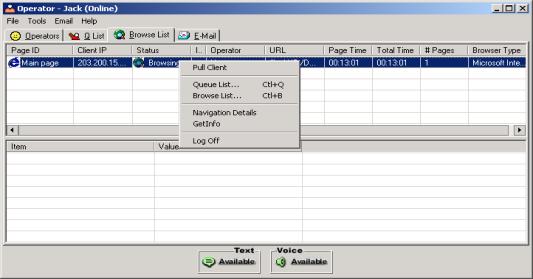
When you right click on a particular entry in the
Browse list, you can view the following options- to Pull the Client, you can
view the Browse List, the Q list, view the Navigation Details of the Client,
Get Info about the Client and the option to Log off.
The following details can be viewed in the Navigation
Details:
·
Page Id: The Page Ids that client has visited.
·
Document: The Document or the URL he is in at
the moment.
·
Referrer: It is the link from where your client
has come into the site.
·
Title: The title of the page, the client has
opened.
·
Time: The time that he has been there in each
page.
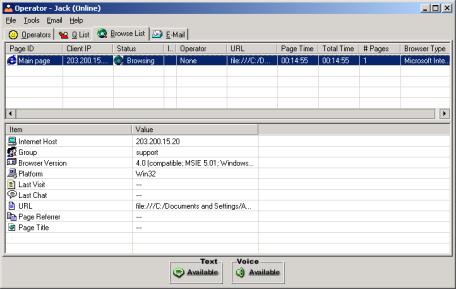
Once a particular entry in the Browse list has been
highlighted the following details are
shown.
·
The Internet Host: This shows the Internet Host
Company that the client is using.
·
Group: Depends on the Tracker code as to which
group you have mentioned on that Page.
·
Browser version: This gives the version of the
Browser that the client is using.
·
Platform: This displays which platform or
operating system the client is using.
·
Last visit: This displays the last visit of the
Client to your Website.
·
Last chat: This shows the last chat had with any
operators of your site.
·
URL: The URL of the page that the client is in
is displayed here.
·
Page Referrer: This refers to the link from
where the client came in for a chat.
·
Page Title: This displays the title of the page
where the client is in.
This feature allows the operator to manage their
E-mails right from their Operator Console itself. Here, operators can view all
the e-mails in the Inbox. They can also send e-mails from the Operator Console
and view the Sent Items and the Outbox. (For more details refer E-Mail Tab
Topic 6.3.3)
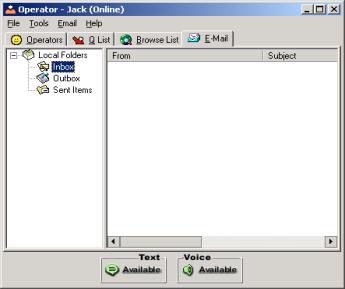
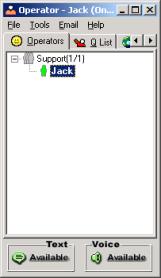
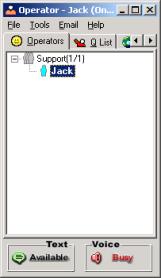
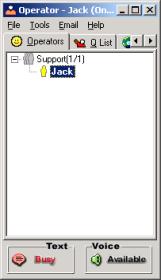
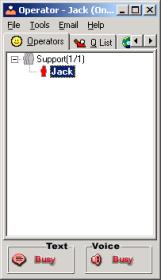
The images above show the various
color schemes provided in order to identify the various modes that the
operators are available on. That is, if the operator is:
- Available in both Text and Voice - Green
- Available in Text and busy in Voice - Blue
- Available in Voice and busy in Text - Yellow
- Busy in both Text and Voice – Red
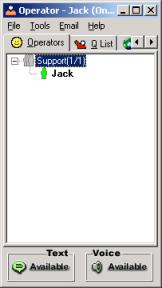
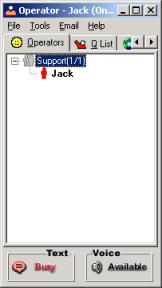
The other option available in case
of color schemes is when the feature of “Voice Chat” is disabled and only the
“Text Chat” option is available. So if the operator is available then the color
is shown as Green and in case the operator is busy it is shown as Red.
This section will guide through
the voice and text chat dialogs that you will encounter while you are in a text
or voice chat with visitors to your web site.
You can have different types of
text chats with your visitors. For example, visitors might click on a default
button with tracker to get into a regular chat with you, or click the E-Faq
button and seek an answer from you.
- Whenever a visitor to your web site enters a text
chat that is routed to you, you see the Text Chat window.
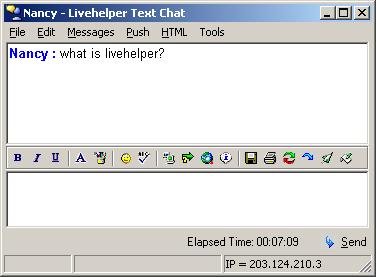
- You can use this window to type your message and send
it. In addition, you also have the following menu options – File, Edit,
Messages, Push, HTML and Tools.
- In the text box, enter your message and click Send
to send your message. You can also make your text message more
interesting by using various fonts, sizes, colors and smileys. Apart from
this, you can also use the various icons to perform various actions.
Use this option to save, print or
exit the text chat.
- Click File to access the file menu.
- Click Save to save the text chat.
- Click Print to print the text chat.
- Click Exit to exit the text chat.
Use this option to select all,
copy, cut and paste text chat contents to a clipboard.
- Click Copy to copy the text chat contents.
This option is enabled only if there is any content for copying.
- Click Cut to cut the text chat contents. This
option is enabled only if there is any content for cutting.
- Click Paste to paste the text chat contents to
a clipboard.
- Click Select All to select all the contents of
the text chat.
Use this option to add or remove
preset messages or to select preset messages to add to the text chat.
- You can view the default message. Click Add/Remove
to add or remove a message. You see the Add Default Message window.
- In the Type your Message here text box,
specify the new message. Use the Preset Keys option to add Preset
Keys or Smileys to your message. Click OK to add your
message or click Cancel to ignore the add message operation.
- Select the existing message and click Modify
to make changes to the existing message. You see the Modify Default
Message window. Make the necessary changes and click OK to save
your changes. Click Cancel to ignore the changes you made.
- Select the existing message and click Delete
to delete the existing message.
- Select the Send these messages whenever I get a
New Client check box to send this message with all your future chats.
Use this menu to add or remove
push links to the visitor. You see the Push Links dialog.
- From the links, select the link that you want to
push.
- You can also view the list of Already Pushed Links.
- From the Mode of Push group box, select New
Window to open the link in a new window on the visitor’s machine or
select the name of the Target Window to open the link on the target
window.
- Click Push to push the link.
- Click Close to close the dialog.
Use this option to send pre-defined HTML images to your
clients. Click HTML. You see the list of HTML images. Select the image
you want to send to your visitor.
Use this option to set the chat to
default format or hide and show the status bar in the chat window. Click Tools.
Select Set to Default Format to set the chat window to the default.
Select Show Status Bar to view the status bar as part of the chat
window. If you want to hide the status bar, select Hide Status Bar.
This section provides you
information about the text chat icons and how you can use them.
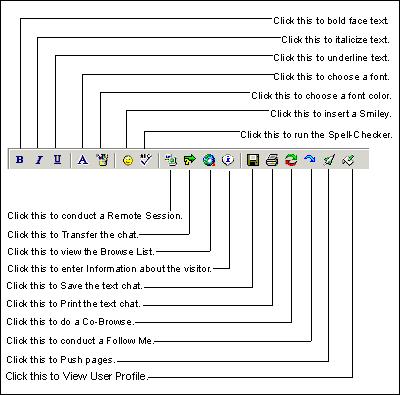
Use the remote session icon to
start a remote session with your visitor. With this feature, you can access the
visitor’s desktop and aid visitor to perform the actions they have a problem
with.
- On the Text Chat window, click the Remote icon.
- You see an alert that asks you to confirm that you
want to send the remote request. Click Yes to confirm or click No
to cancel the remote request.
- When you confirm the remote request, your visitor
sees a message informing about the remote session.
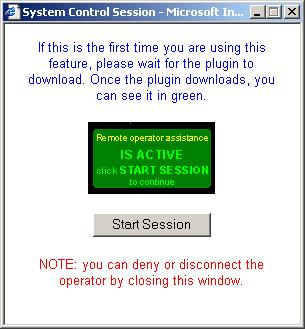
- The visitor must click Start Session for you
to be able to start the remote session. You see the Remote screen.
- Note that whatever actions you perform take place on
the visitor’s machine. The visitor also has the prerogative to close a
remote session by closing the window.
Use this option to transfer a
voice chat to another online operator.
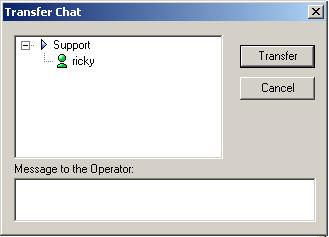
- Click the Transfer icon. You see the Transfer
Chat window.
- From the Operator List tree, you can see the list of
online operators in hierarchical order. Select the name of the operator to
whom you want to transfer the voice chat.
- Enter a Message to the Operator. This could contain
a reason for transferring the chat.
- Click Transfer to transfer the chat. The
operator to whom you are transferring the chat receives a message
informing about the transfer. Click Accept to accept the transfer.
Click Reject to reject the transfer.
- Click Cancel to ignore the transfer operation.
Use this option to enter
information about the visitor. This information is visible to other operators
if they click the Information icon on the Browse List.
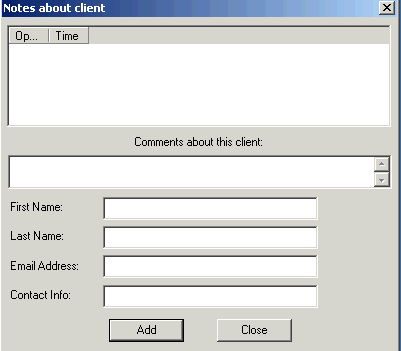
- Click the Information icon. You see the Notes
about client window.
- Your name is specified by default if you are
the Operator who entered the information.
- The Time is also specified by default and is
the time at which the information was entered.
- Enter comments about the client in the Comments
about this client text box.
- Enter the First Name, Last Name, E-mail
Address and Contact Info of the client.
- Click Add to add the information.
- Click Close to close the window.
Use this option to do a co-browse
session with your visitor. This is useful when you want the visitor to be
synchronized with you while displaying information on a web page. Note that the
co-browse feature is specific to a particular browser instance only and does
not extend to the visitor’s desktop.
- Click the Co-Browse icon to request a
co-browse session.
- Your visitor will view the following dialog:
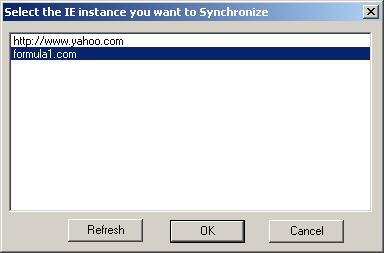
- The visitor will select the instance of Internet
Explorer or Netscape Navigator that they want to synchronize.
- Once the visitor has selected the instance for
synchronizing, you see the Co-browse screen.
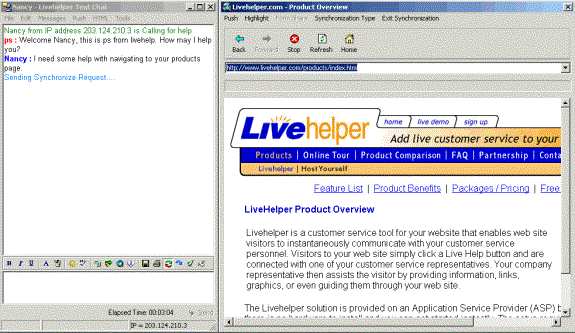
- You can use this co-browse feature to Push web
pages, Highlight text, Form Share, view the Synchronize
Type – this could be Co-browse or Follow-me, and Exit
Synchronization.
- Select the Push menu to push web pages to the
visitor. You see the Push dialog that enables you to select the pages you
want to push, select the target window for viewing, view the URLs that you
have already pushed and so on.
- Select Highlight to highlight certain text you
want the visitor to notice. You can further select the color for
highlighting.
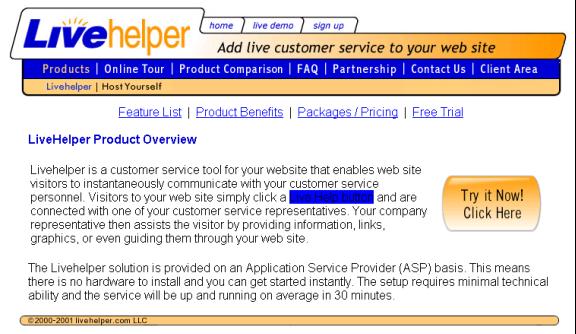
- Select Form Share to conduct a form sharing
session. Note that this is available to you only if you selected the
form-sharing feature. You see the Form Share screen.
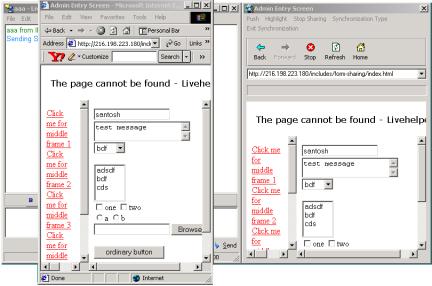
- When you specify details in the form on your window,
it is reflected in the visitors form as well.
This is similar to the co-browse
feature except that this involves a one-way sync. This implies that the visitor
can view what you as an operator are doing. However, you will not be able to
view the visitor’s actions.
- Click the Follow-Me icon to conduct a
follow-me session.
- Your visitor sees the Select Instance window. Once
the visitor has selected the instance for synchronizing, you see the
Follow-me screen. This screen is similar to the co-brose screen and
enables you to perform the same actions. These are Push web pages, Highlight
text, Form Share, view the Synchronize Type – this could
be Co-Browse or Follow-Me, and Exit Synchronization.
Use this menu to push links to the
visitor.
- Click the Push Links icon. You see the Push
Links dialog.
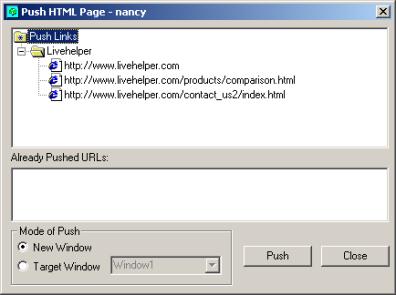
- From the links, select the link that you want to
push.
- You can also view the list of Already Pushed Links.
- From the Mode of Push group box, select New
Window to open the link in a new window on the visitor’s machine or
select the name of the Target Window to open the link on the target
window.
- Click Push to push the link.
- Click Close to close the dialog.
Use this option to view user
profiles of the visitor. You can view Customer Info, Visit History,
Chat History, Notes, and System Info details.
- Click the User Profile icon. You see the User Profile
window.
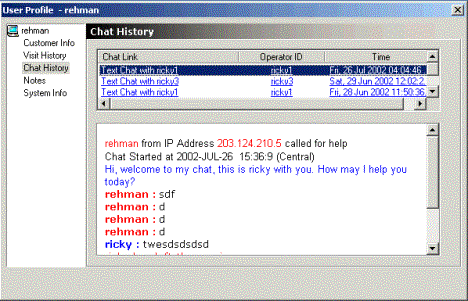
- Click Customer Info to view information about
the customer.
- Click Visit History to view the customer’s
visit history. You see a list of the history. Click a link to view more
information about the selected visit.
- Click Chat History to view information about
the chats that the visitor initiated. You see the list of chats with
details such as the Chat Link, Operator ID of the operator
with whom the visitor chatted, the Time of the chat including the
date. Click the Chat Link to view details of the chat.
- Click Notes to view details of any notes made
about the visitor. You can view the name of the Operator who
entered the notes, and the Time at which the information was
entered. Select the Operator Name to view the Comments. You
can see the First Name, Last Name, E-mail Address and
Contact Info of the client. Click Add to add more
information.
- Click System Info to view the visitor’s system
information. You see the System Info window. You can see details such as Browser,
JavaScript Version, Monitor Color Depth, Language and
Domain.
Whenever a visitor to your web
site clicks on the E-FAQ button and conducts a search, they also receive an
option to ask you, the operator, a question. The visitor can click on the link
and ask you the question. If the visitor exercises this option, you receive an
E-FAQ Answer Dialog.
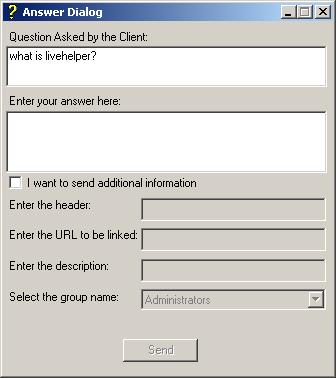
On the other hand, if no operators
are online, the visitor has an option to have an operator call back. If the
visitor clicks this link, you as the operator receive a Call Request window.
- In Question Asked by the Client you see the
question as asked by the visitor.
- In Enter you answer here, type in your
response.
- Select the I want to send additional information check
box to send additional information to the visitor. If you select this
option, the rest of the dialog is enabled.
- In Enter the header, enter the header for the
additional information.
- Enter the URL to be linked in the space
provided.
- Enter the description for the information.
- Select the group name from the drop-down list.
- Click Send to send your response.
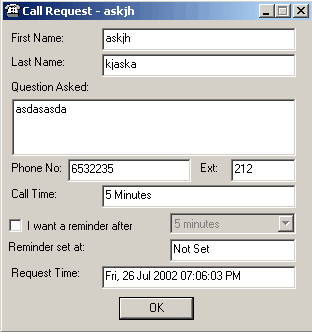
- You see the First Name and the Last Name of
the visitor.
- You see the Question Asked by the visitor.
- You see the Phone Number and the Extension of
the visitor.
- You see the Call Time in which you must
respond to the call.
- Select the I want a reminder after check box
to receive a reminder. In the now enabled drop-down list, select the time
after which you want to receive a reminder.
- If you set a reminder, you see the time when the reminder
was set.
- You see the Request Time of the call.